Flying geese are among the most recognizable shapes in quilting. Once you start noticing them, you’ll see them everywhere: borders, stars, arrows, and sometimes entire quilts made from rows of flying geese.
In Week 5 of the Skill Builder Quilt Along, we’re learning how to make flying geese four at a time using a no-waste method. This technique is efficient, beginner-friendly, and perfect for quilters who dislike discarding perfectly good fabric.
And the best part?
We’re officially halfway through the blocks in the Skill Builder Quilt Along, which means participants are already building some serious quilting skills.
If you haven’t joined us yet, you can still jump in!
But first, let’s talk about flying geese.
What Are Flying Geese in Quilting?
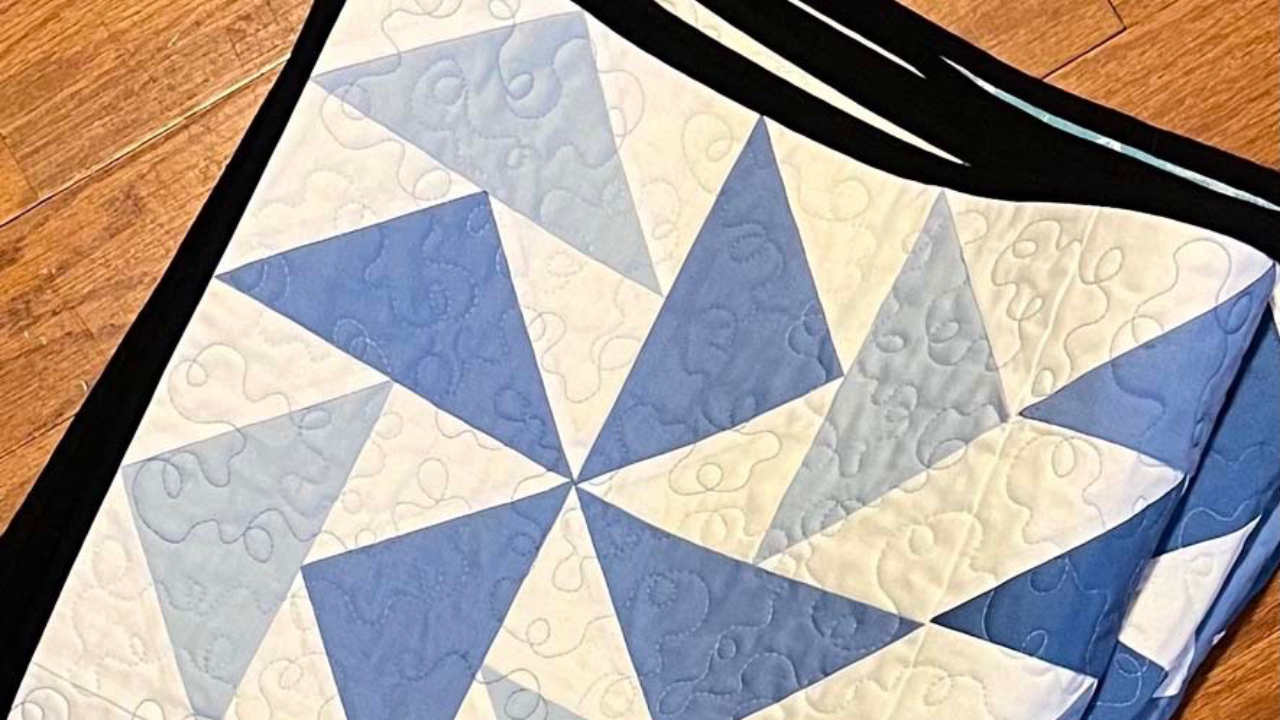
A flying geese unit consists of one large triangle in the center (the “goose”) and two smaller triangles on the sides (the “sky”). The finished unit is usually twice as wide as it is tall, giving flying geese their characteristic arrow-like shape.
Quilt makers love using flying geese because they add movement and direction to a quilt. Rows of flying geese can guide your eye across the quilt top and create beautiful visual patterns.
Since they appear in many quilt designs, learning how to make them well is an important skill for any quilter.
Building on What We’ve Already Learned
Earlier in the Skill Builder Quilt Along, participants learned how to create flying geese using the stitch-and-flip method.
That technique is a great starting point because it’s simple and easy to understand. It also helps beginners learn how flying geese units are built.
But there’s one small downside.
The stitch-and-flip method needs trimming fabric corners after sewing, which leaves small scraps that usually can’t be used for anything else.
That’s where this week’s method comes in.
The No-Waste 4-at-a-Time Flying Geese Method
The 4-at-a-time flying geese method improves on the stitch-and-flip technique in two major ways.
First, it’s efficient. Instead of making one unit at a time, this method creates four flying geese units at once.
Second—and this is the part many quilters love—it’s no waste.
Every piece of fabric you cut becomes part of a flying geese unit. Nothing gets trimmed off and thrown away.
If you’re someone who likes to make the most of every bit of fabric, this method is incredibly satisfying to use.
How the 4-at-a-Time Method Works
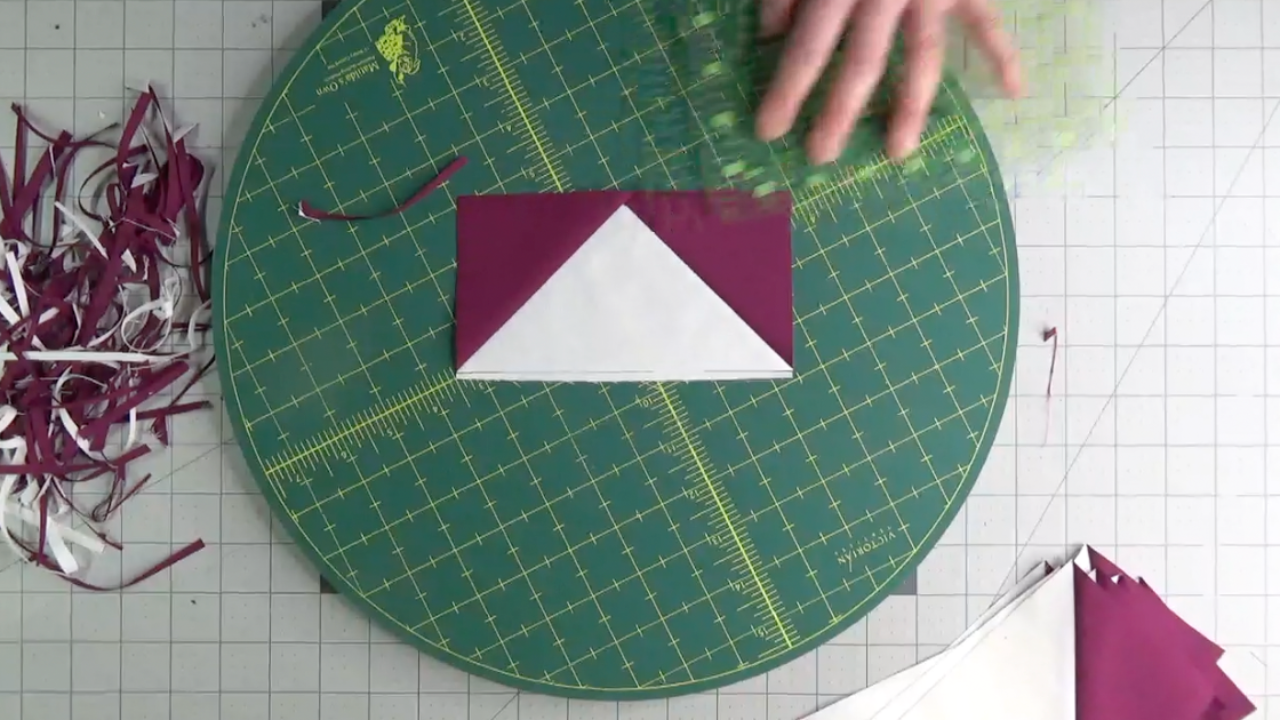
Draw a diagonal line on the wrong side of four smaller squares. Take two of these squares and align them on the larger square so that your marked diagonal lines form one continuous line from corner to corner. Sew a quarter inch away from each side of the line, then cut the square in half along the line. After pressing these units, you’ll create a heart. Take a moment to pause and think about how much you love quilting!

Then, you’ll place a small marked square at the bottom point of your heart and sew one-quarter inch away from each side of the line. You’ll cut that unit along the line and press. Do this with both heart pieces, and you will now have four flying geese blocks!
It’s a simple process once you see it in action, and it can save a lot of time when a quilt pattern calls for many flying geese units.
Tips for Perfect Flying Geese
If you’re new to this method, here are some tips to help your units turn out beautifully.
Mark your lines carefully. Accurate diagonal lines help your seams land exactly where they should.
Use a consistent seam allowance. If you sew too far away from your drawn lines, it will be harder to trim them to size later.
Press gently. The seams on these units are on the fabric's bias, which can stretch if they’re handled too roughly. Pressing instead of ironing helps keep everything square.
Protect your points. When you trim your unit, make sure there’s a quarter inch between the top of the point and the edge of your ruler for the seam allowance. This protects the point when the unit gets sewn into a block later.
That tiny detail can make a big difference in the finished quilt.
Quilting Skills Grow With Practice
One of the things I remind my students all the time is this:
Your first units don’t have to be perfect.
Every block you make builds muscle memory and helps you become more comfortable with the techniques.
Participants in the Skill Builder Quilt Along have already picked up various quilting skills—from half-square triangles to flying geese—and each new block adds another tool to their quilting toolkit.
By the end of the quilt-along, they’ll have a whole collection of skills they can use in future quilts.
Join the Skill Builder Quilt-Along
If you’ve been watching from the sidelines, it’s not too late to join us!
Inside, you’ll learn essential quilting units step-by-step while making quilt blocks using that week’s technique. The goal is to help you build confidence with the core skills that appear repeatedly in quilt patterns.
Each lesson walks you through the technique, shares helpful tips, and shows you how the units come together in a finished block.
If you’ve ever wanted to feel more confident about your quilting skills, this is a great place to start.
Click or tap on the links or image to sign up!