Some quilt blocks are exciting because they introduce a brand-new technique. Others are exciting because they take two things you already know how to do and combine them into something completely fresh. The split quarter-square triangle is the second kind, and it’s one of my favorite ways to wrap up a series like this one.
It’s a small, deceptively simple block. Half of it is a familiar half-square triangle. The other half is two smaller triangles meeting at a point. Three different fabrics share one center, and the result is a block that adds movement, direction, and a surprising amount of visual interest to a quilt.
In Week 10 of the Skill Builder Quilt Along, our final block, the split quarter-square triangle is our focus. Let’s take a closer look.
What Is a Split Quarter-Square Triangle?
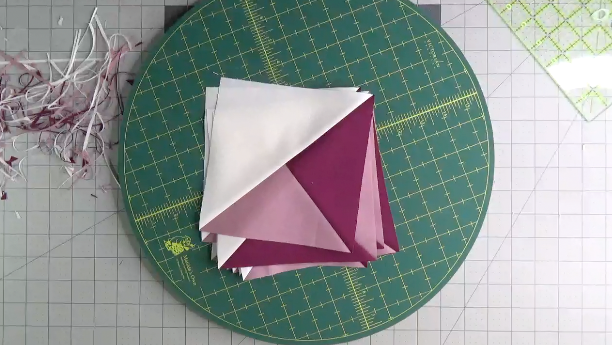
A split quarter-square triangle is exactly what its name suggests. One half of the block is a single, whole half-square triangle. The other half is split into two, with two smaller triangles, the quarter-squares, meeting along a diagonal. When the block is finished, three different fabrics meet at the center point.
The construction is wonderfully practical. Instead of starting from scratch with four triangles like a true quarter-square triangle, you start with a half-square triangle you’ve already pieced and pair it with a single square of fabric. A diagonal seam across that pairing creates the split, and from one pairing, you get two finished blocks.
It’s a great example of how quilting techniques build on each other. Once you’ve made a half-square triangle, you’ve already done most of the work.
Where Do Split Quarter-Square Triangles Show Up in Quilting?
Split QSTs are everywhere once you start looking. Their directional, asymmetrical shape makes them one of the most useful design tools in both modern and traditional quilting.
You’ll find them in:
- Storm at Sea quilts, where they help create the curving, water-like illusion the design is famous for
- Pinwheel and chevron variations, where their directionality adds rhythm and motion
- Modern geometric quilts that lean on asymmetry and unexpected angles
- Star block variations that need a little extra detail at the points
- Pieced borders that benefit from a sense of direction
- Sampler quilts and improvisational designs, where a single split QST can shift the whole feel of a block
If you’ve ever admired a quilt with a strong sense of movement and wondered how the designer pulled it off, there’s a good chance a split quarter-square triangle is part of the answer.
Why Split Quarter-Square Triangles Are Worth Learning
The most rewarding part of learning a split QST is that you’re not really learning anything new from scratch. You’re combining two techniques you already have under your belt, the half-square triangle and the quarter-square triangle, into a single, more interesting block. That kind of skill stacking is where quilting starts to feel less like following a recipe and more like having a toolkit you can reach into.
It’s also a block that quietly opens a lot of design possibilities. Because split QSTs are directional, you can rotate and arrange them to create curves, waves, arrows, and motion that feel impossible from a few simple pieces of fabric. Once you’re comfortable making them, you’ll see them as an option in patterns you might have skipped right past before.
Tips for a Clean Split QST Block
Like any block where multiple seams meet at one point, a split QST rewards a little extra care in the small details. A few habits will make a noticeable difference in your finished block.
Don’t square up your HST before you pair it with a square. You’re making these blocks slightly oversized so you can trim them to the exact dimensions later on. If you leave your HST untrimmed, you maximize the amount of wiggle room you’ll have in the trimming step.
Mark your diagonal line carefully. Draw your diagonal across the back of your top square so that it sits perpendicular to the existing HST seam. A clearly drawn line gives you something exact to follow and to cut along.
Watch your block orientation. Split QSTs are directional. As you press and stack your finished blocks, keep an eye on which way they’re facing so they end up oriented the way your pattern wants them in the final layout.
Square up the finished block. There’s a center intersection now where three fabrics meet, and an accurate, square block is what keeps that intersection looking sharp once it’s sewn into your quilt top.
Bringing it All Together
The split quarter-square triangle marks ten weeks of new techniques in the Skill Builder QAL. Strip piecing, half-square triangles, flying geese, the 8-at-a-time HST method, no-waste flying geese, quarter-square triangles, half-rectangle triangles, square-in-a-square, foundation paper piecing, and now the split quarter-square triangle. That is a real, working skill set, the kind that lets you pick up almost any pattern and feel confident you can tackle it.
Want to Join Now and Sew the Whole Pattern at Once?
If you’ve been watching from the sidelines and never quite jumped in, this is a wonderful time to sign up. With the final block live, the entire pattern is now available all at once, which means you can move through it on your own timeline rather than week by week. It’s a great fit for a long weekend, a sewing retreat, or a few cozy stretches at home when you have time to dive in.
Your sign-up gets you every block tutorial in the series, the full quilt-top assembly instructions, ideas for projects to make with your leftover blocks, and finishing and binding instructions so you can take your quilt all the way to a finished piece.
Two More Bonuses on the Way
Even though this is the final block, we’re not quite done. Next week, you’ll get two more bonuses to help you cross the finish line. The first is a primer on how to baste your quilt to get it ready for quilting, including what you need, how to do it, and how to set yourself up for an easier quilting experience. The second is a file with three quilting plans you can borrow if you’d rather use one of mine than design your own from scratch.
You can find all the details on the Skill Builder QAL home page. We’d love to have you with us for the finish.