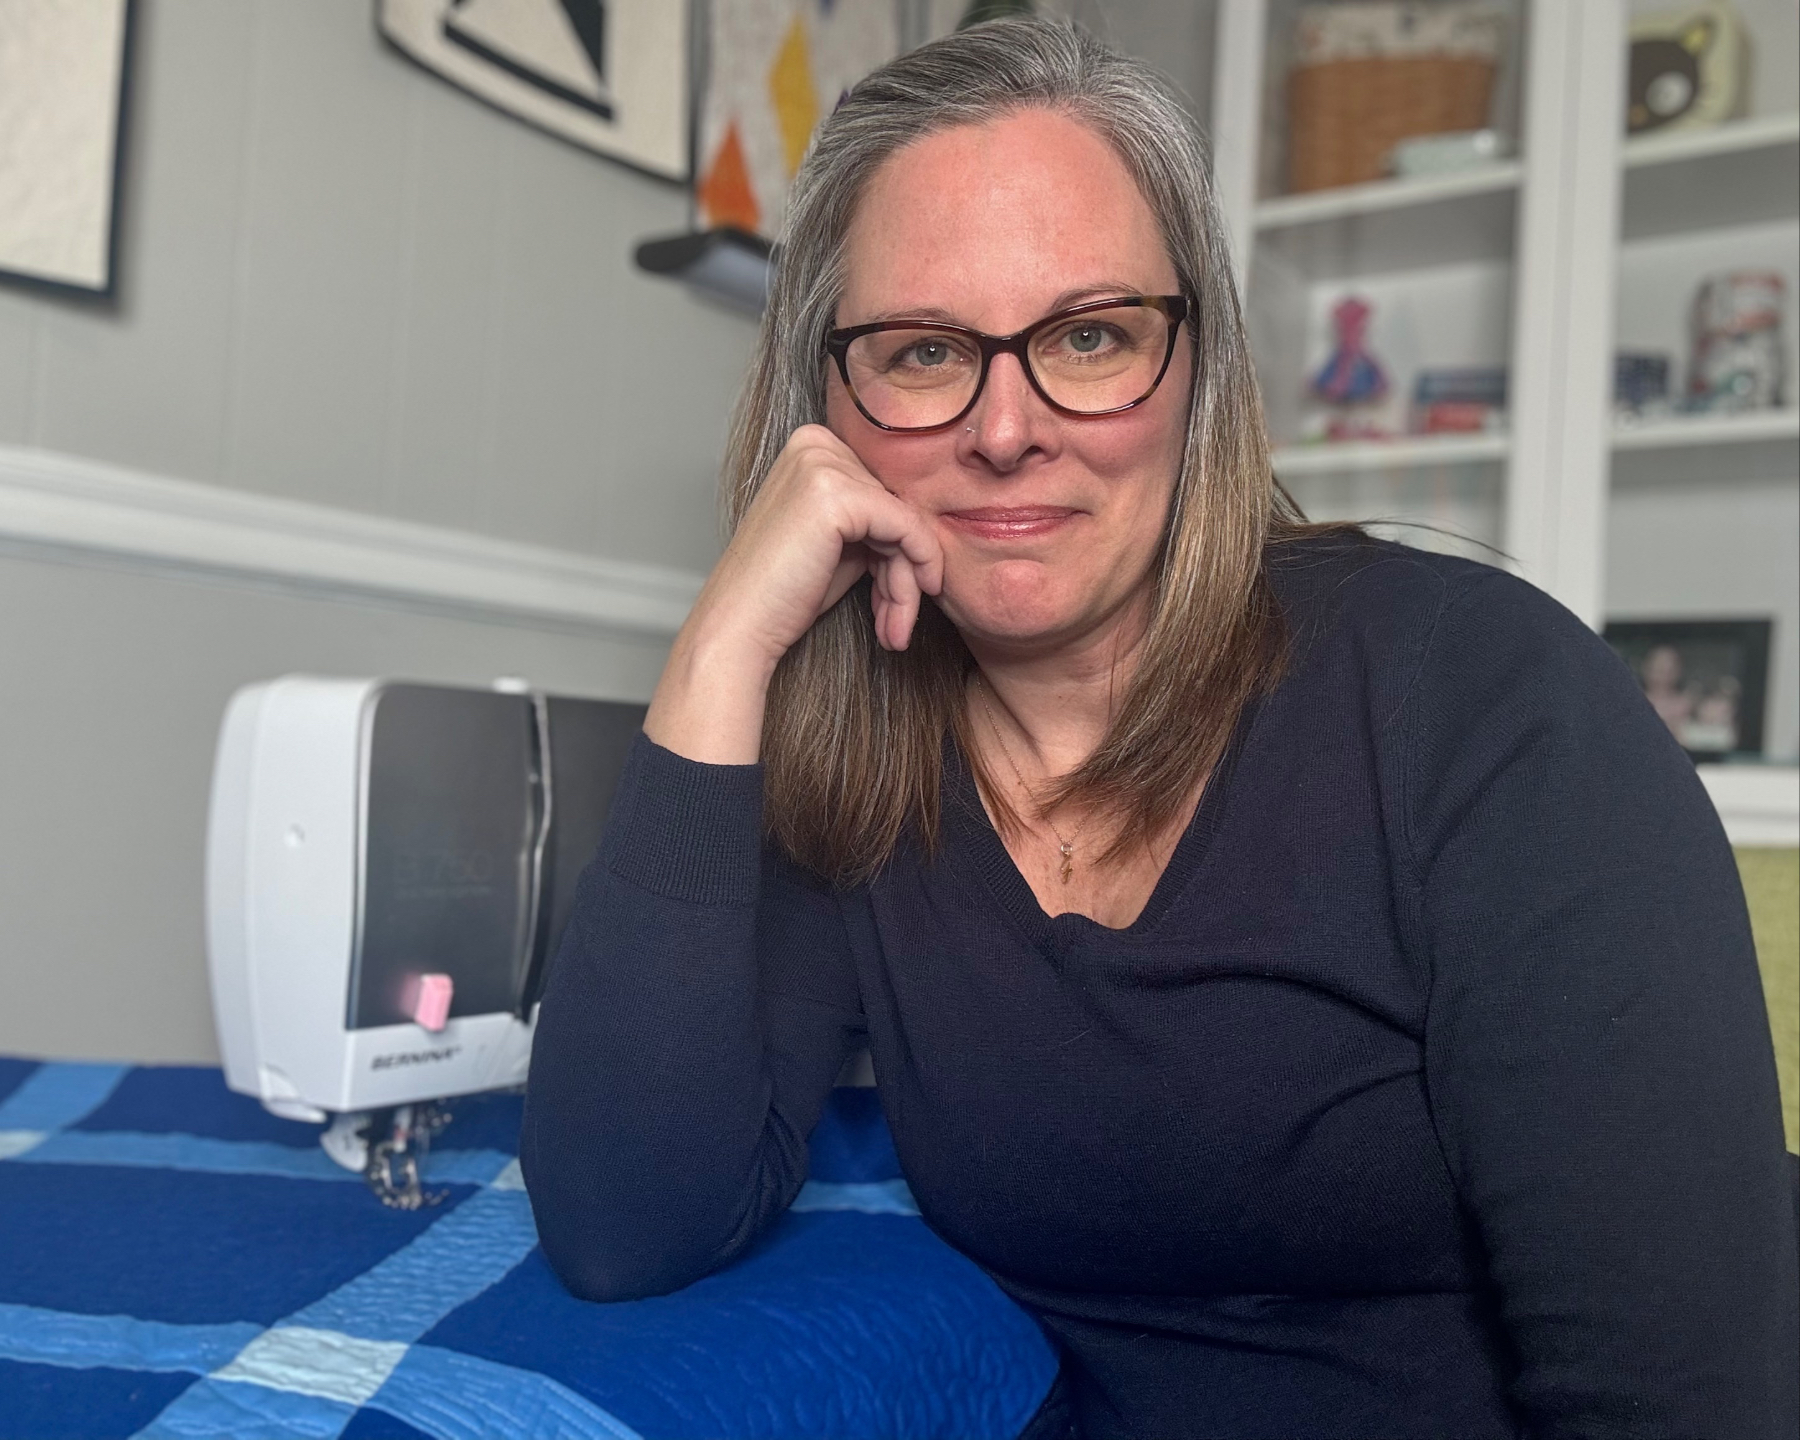
My niece graduated from high school at the beginning of the month, and I couldn’t be prouder of her. I was fortunate enough to travel to Indiana to celebrate her with the rest of my family. Naturally, she was receiving a quilt as her graduation gift from Aunt Joni. But first, let me share a quick backstory.
When I was in California last November visiting my daughter, I saw this wall at the restaurant we went to for her birthday.
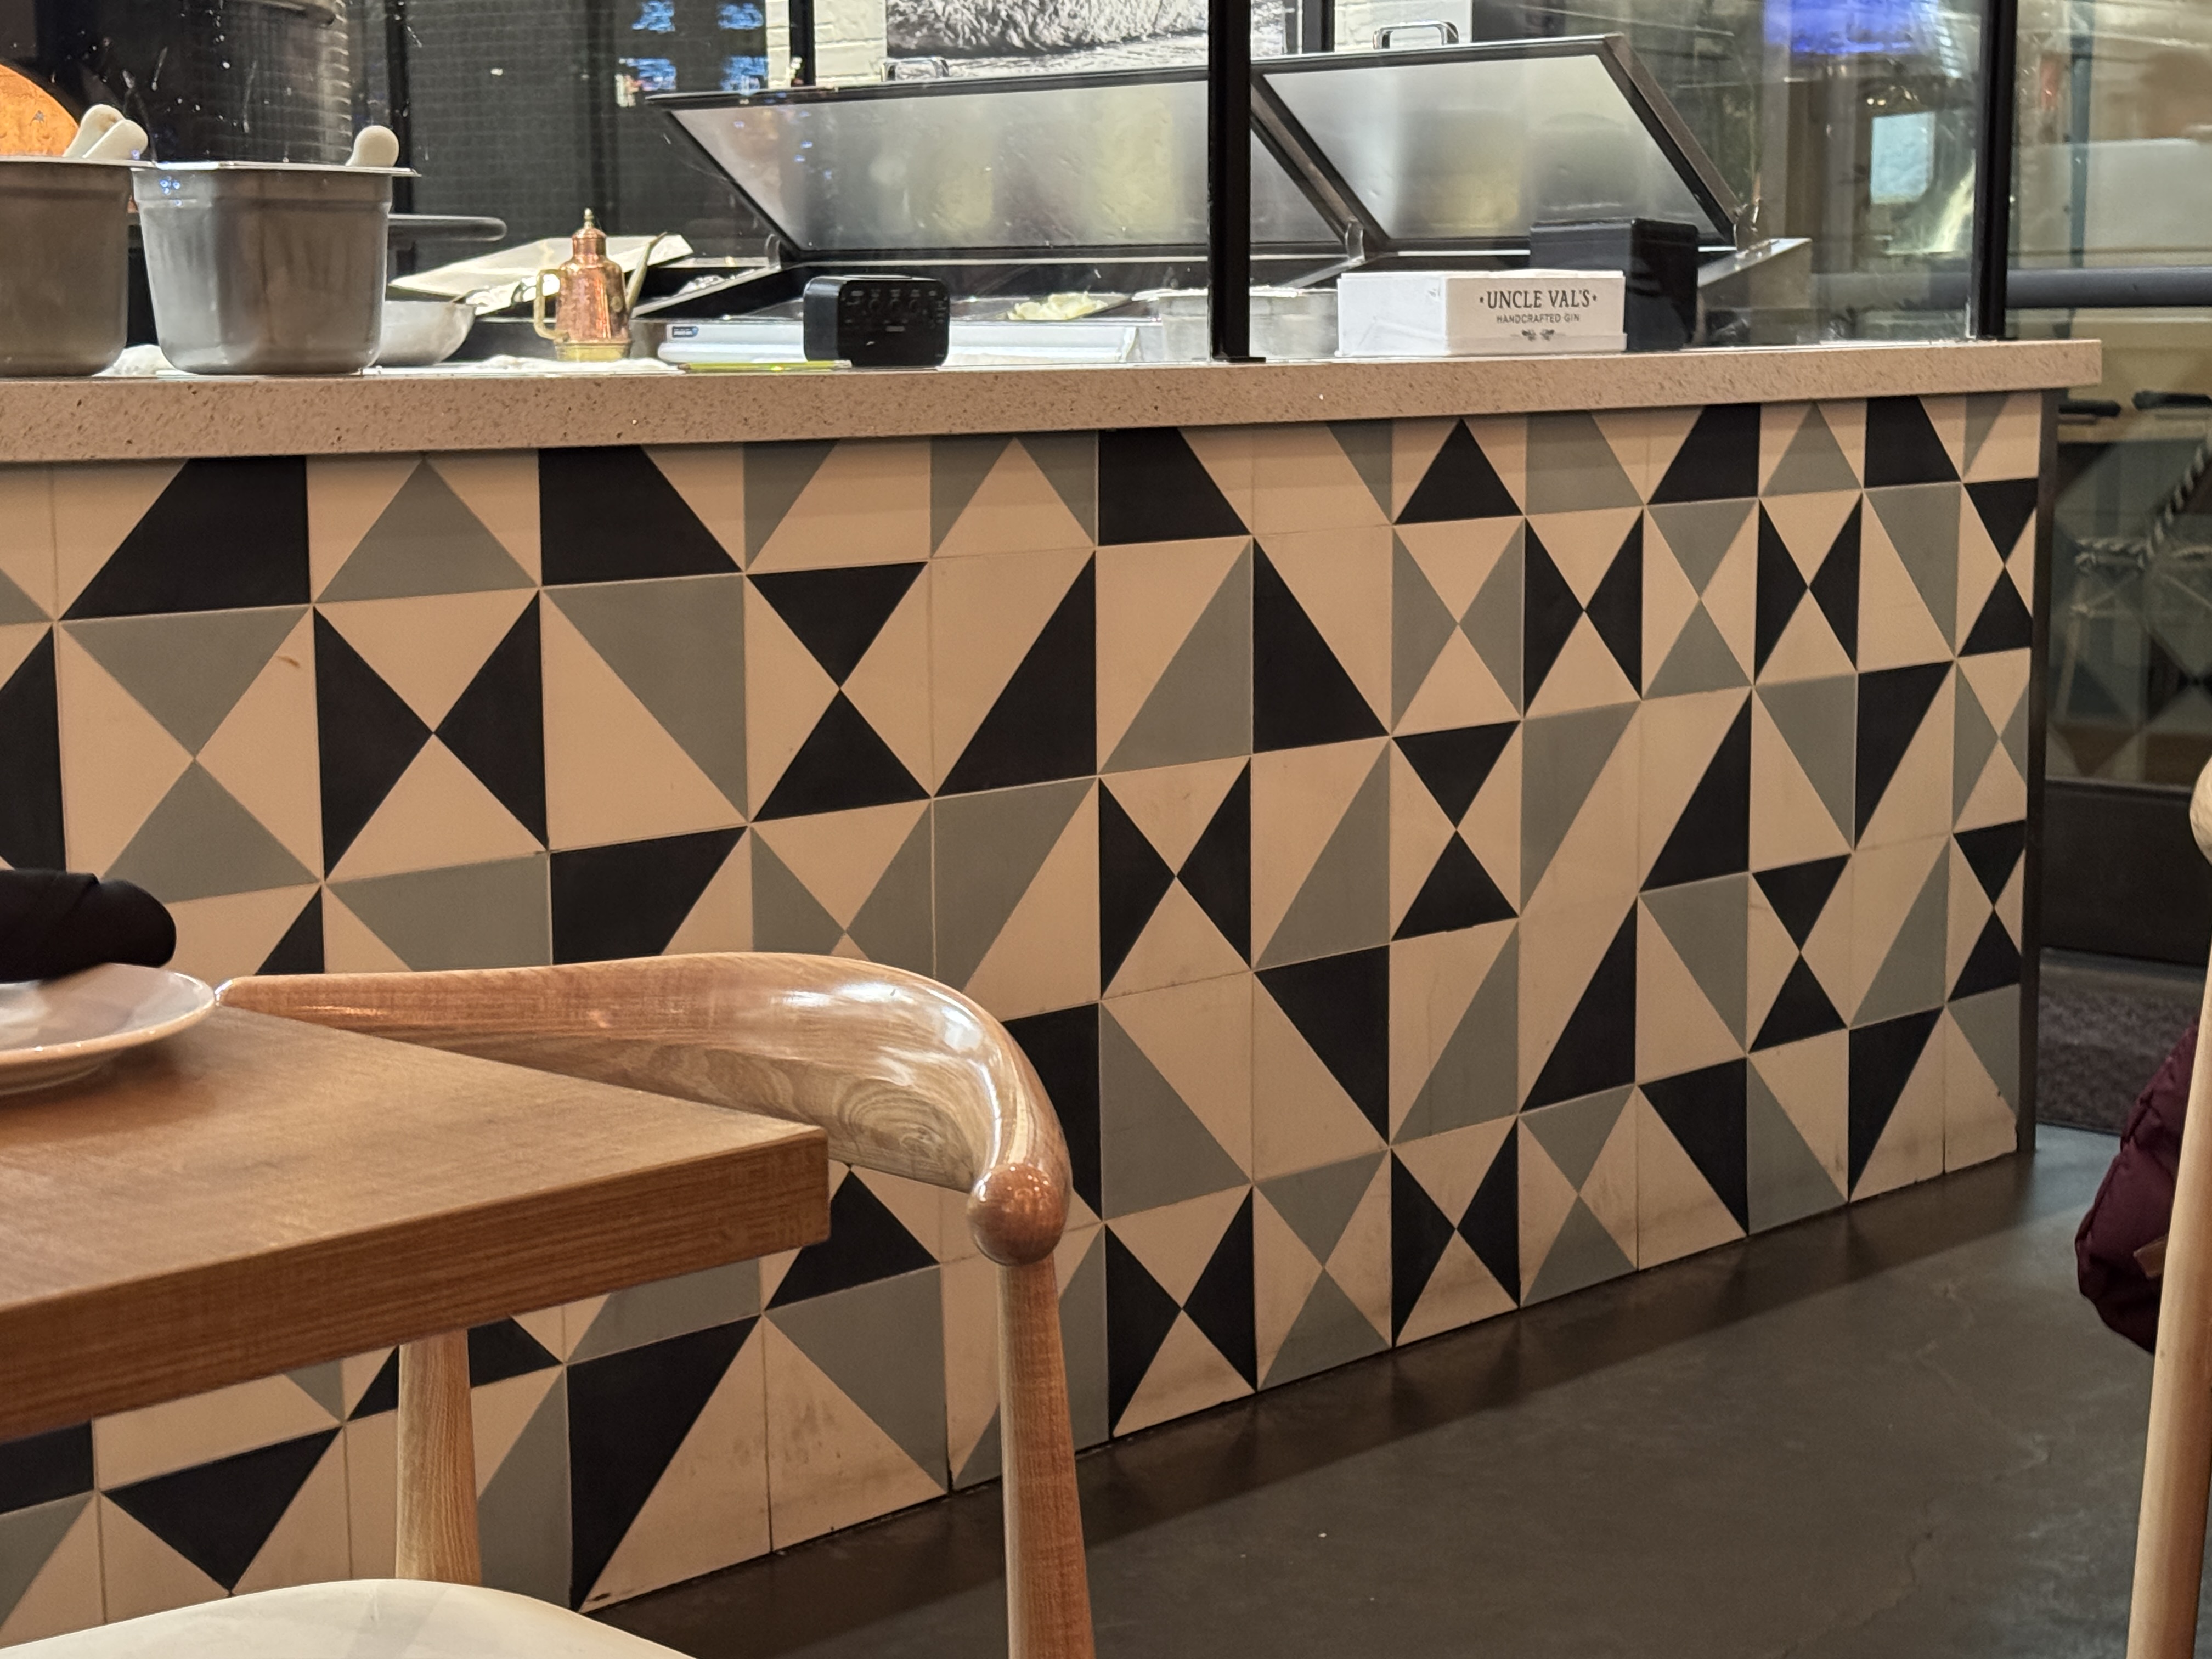
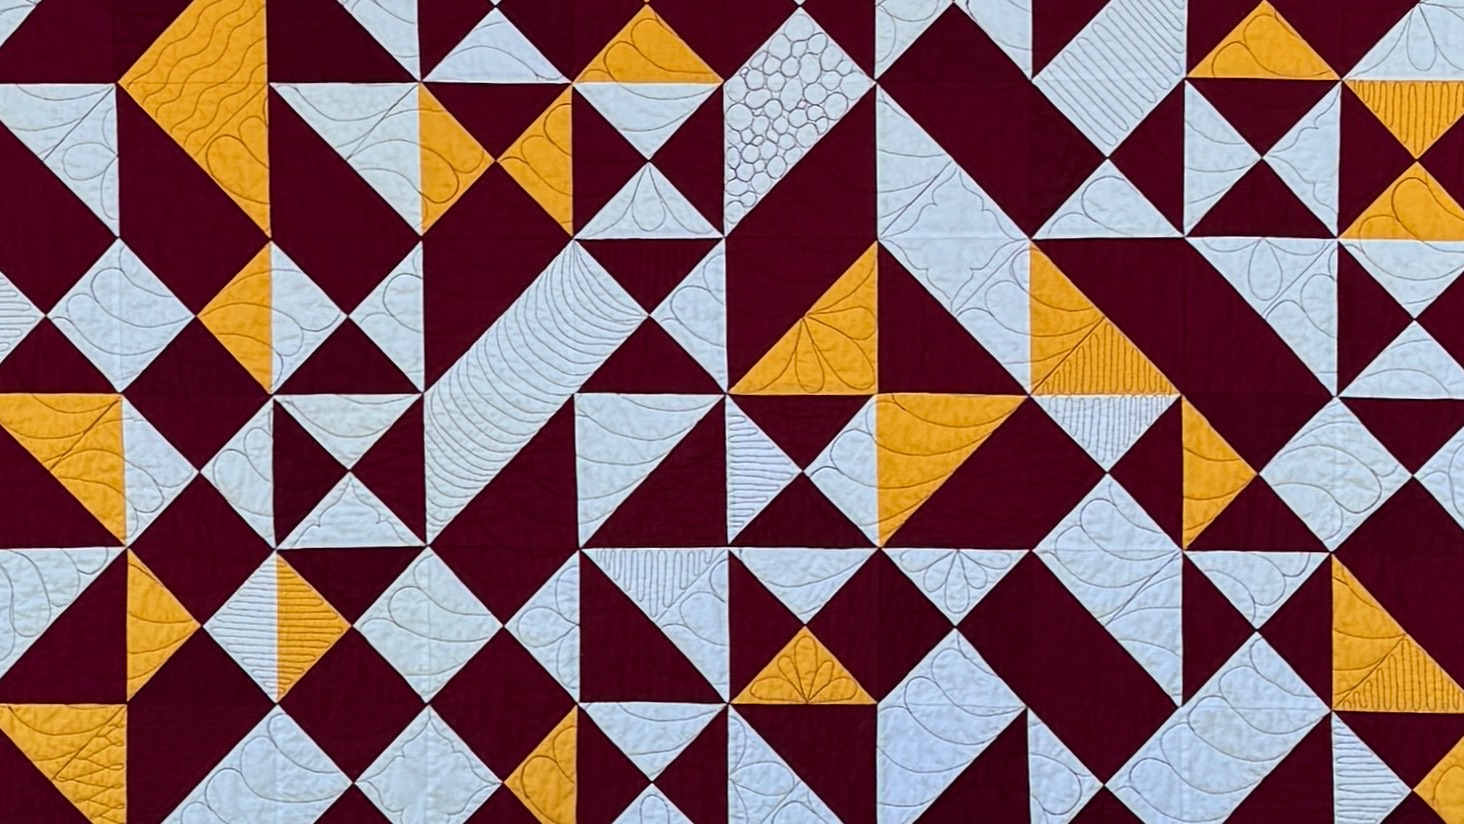
Quilters have so many pictures like this in their photo roll, but this is the first time I took something from the wall and turned it into a quilt.
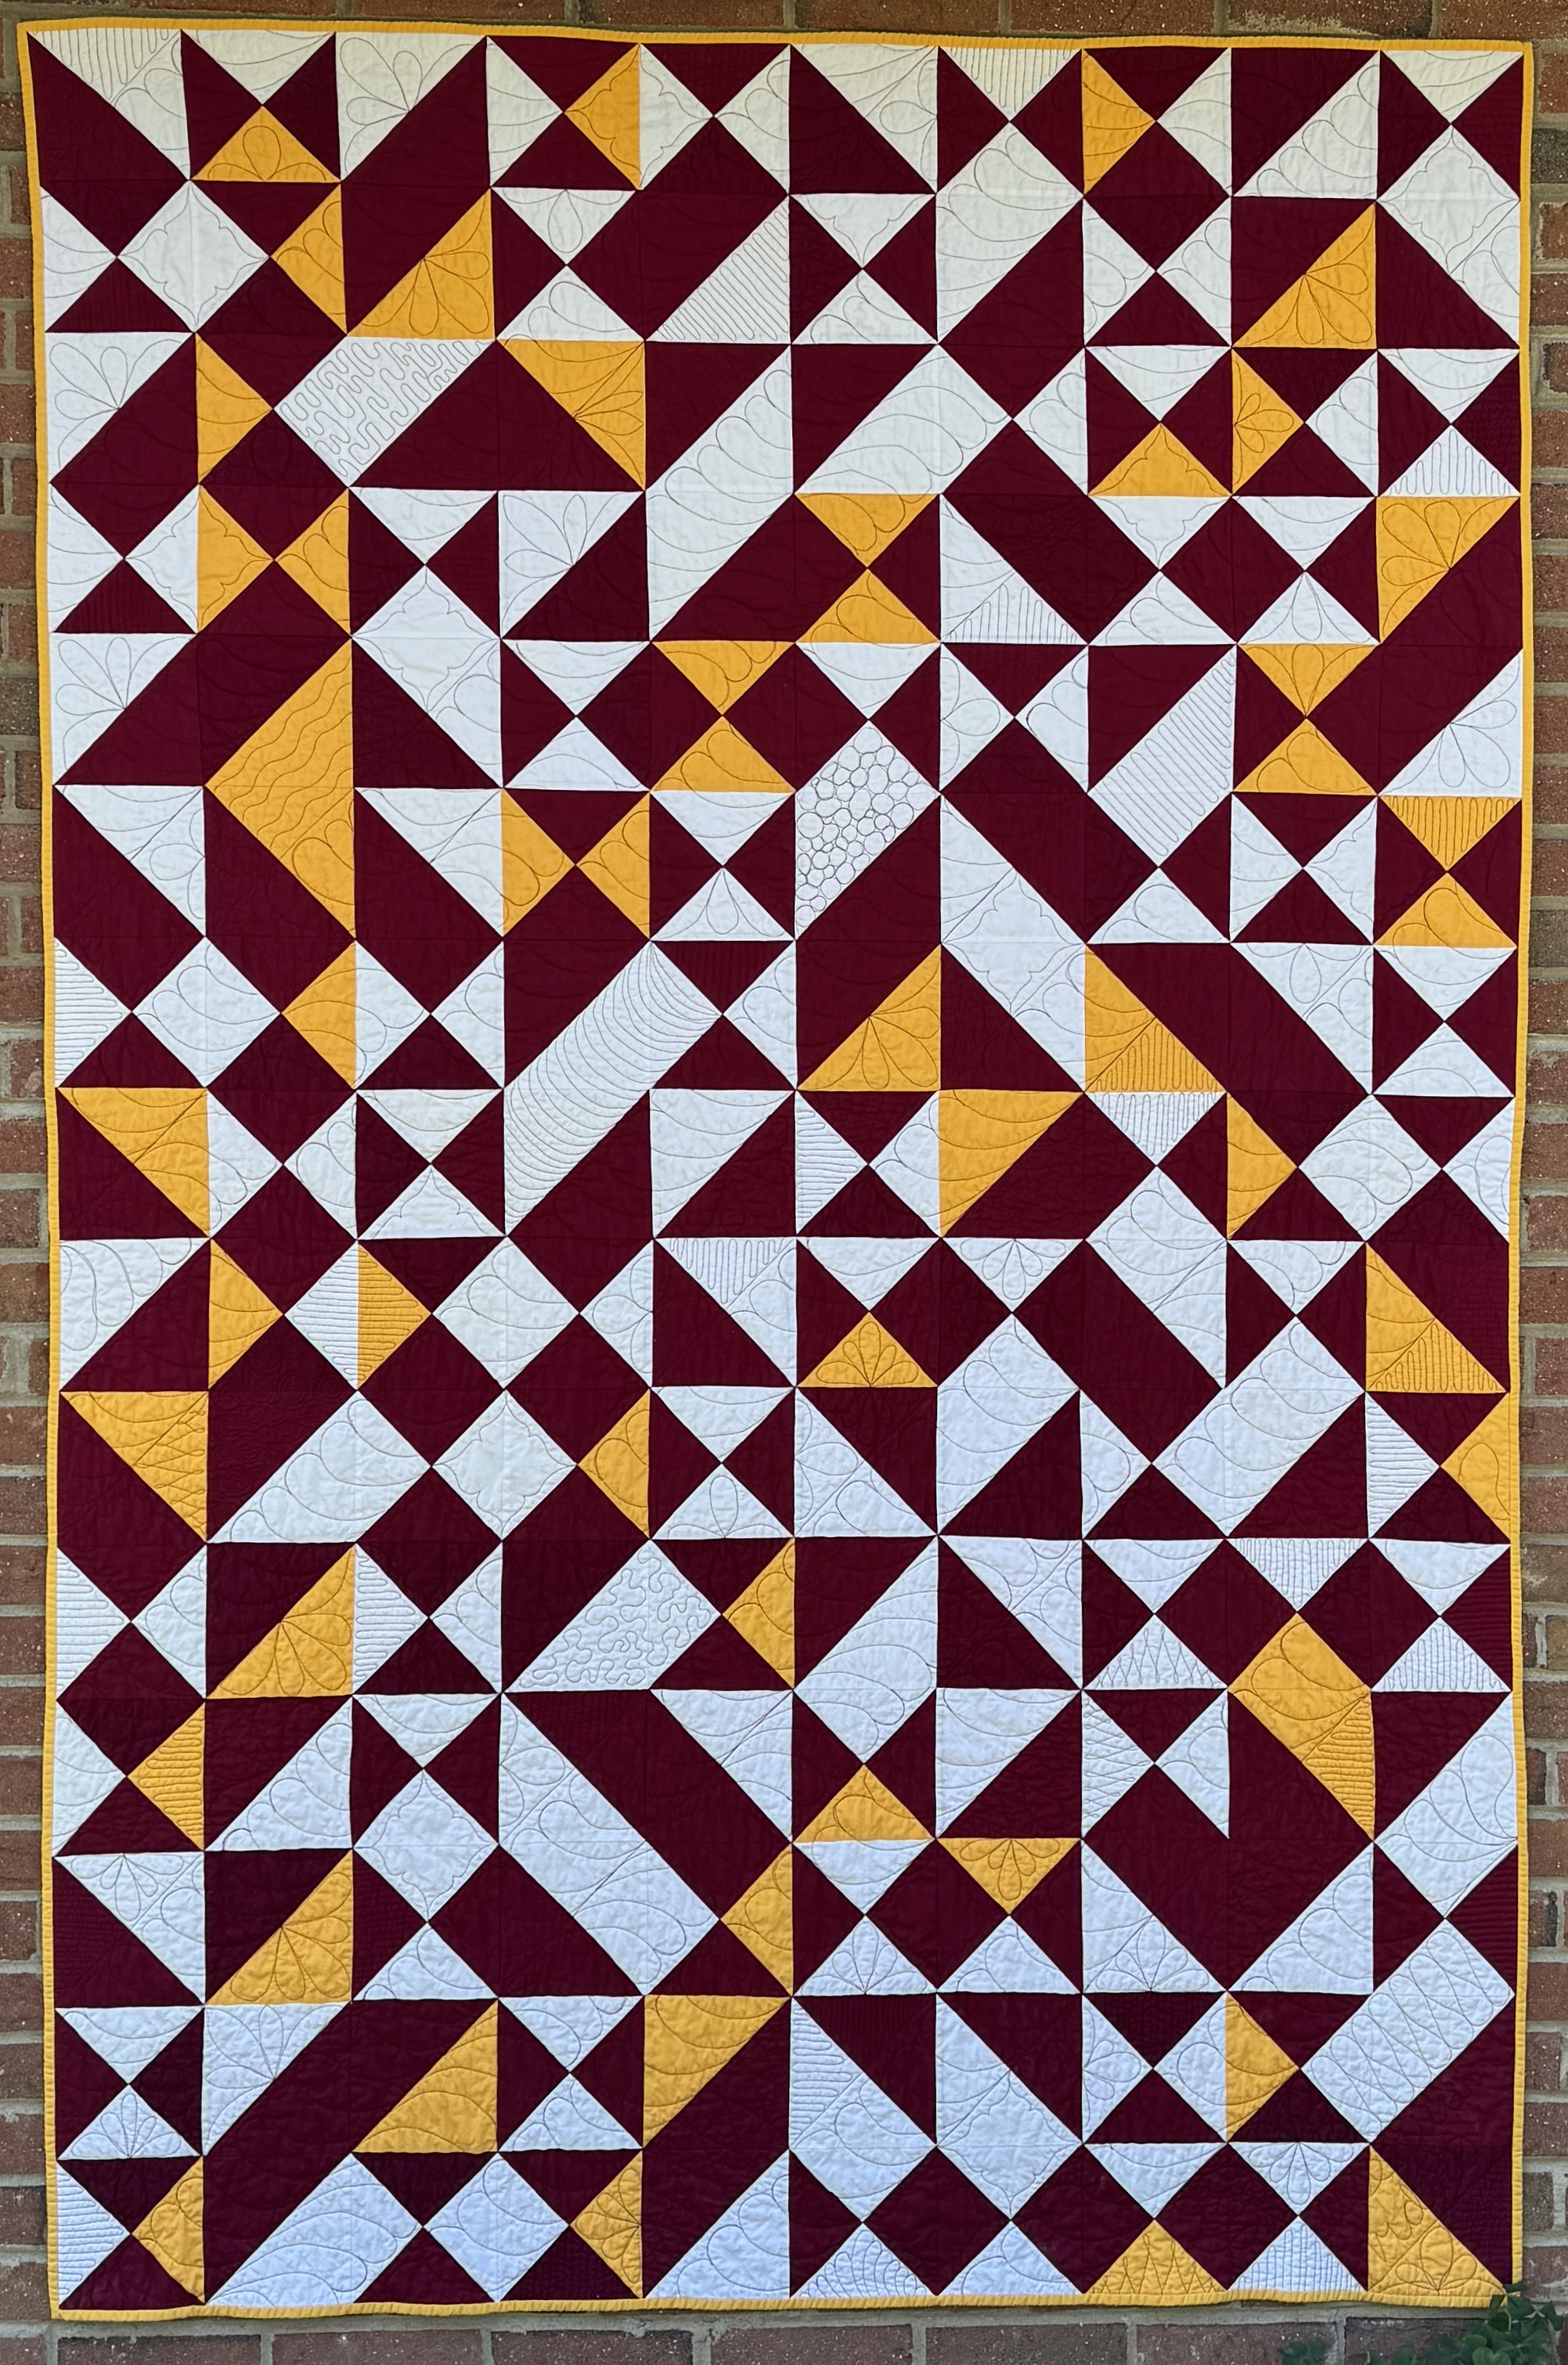
Maroon is the primary color of her high school, making up half of the quilt. Yellow is part of her college’s color palette, and I love how they complement each other. I needed some breathing room, so I added white for contrast and balance.
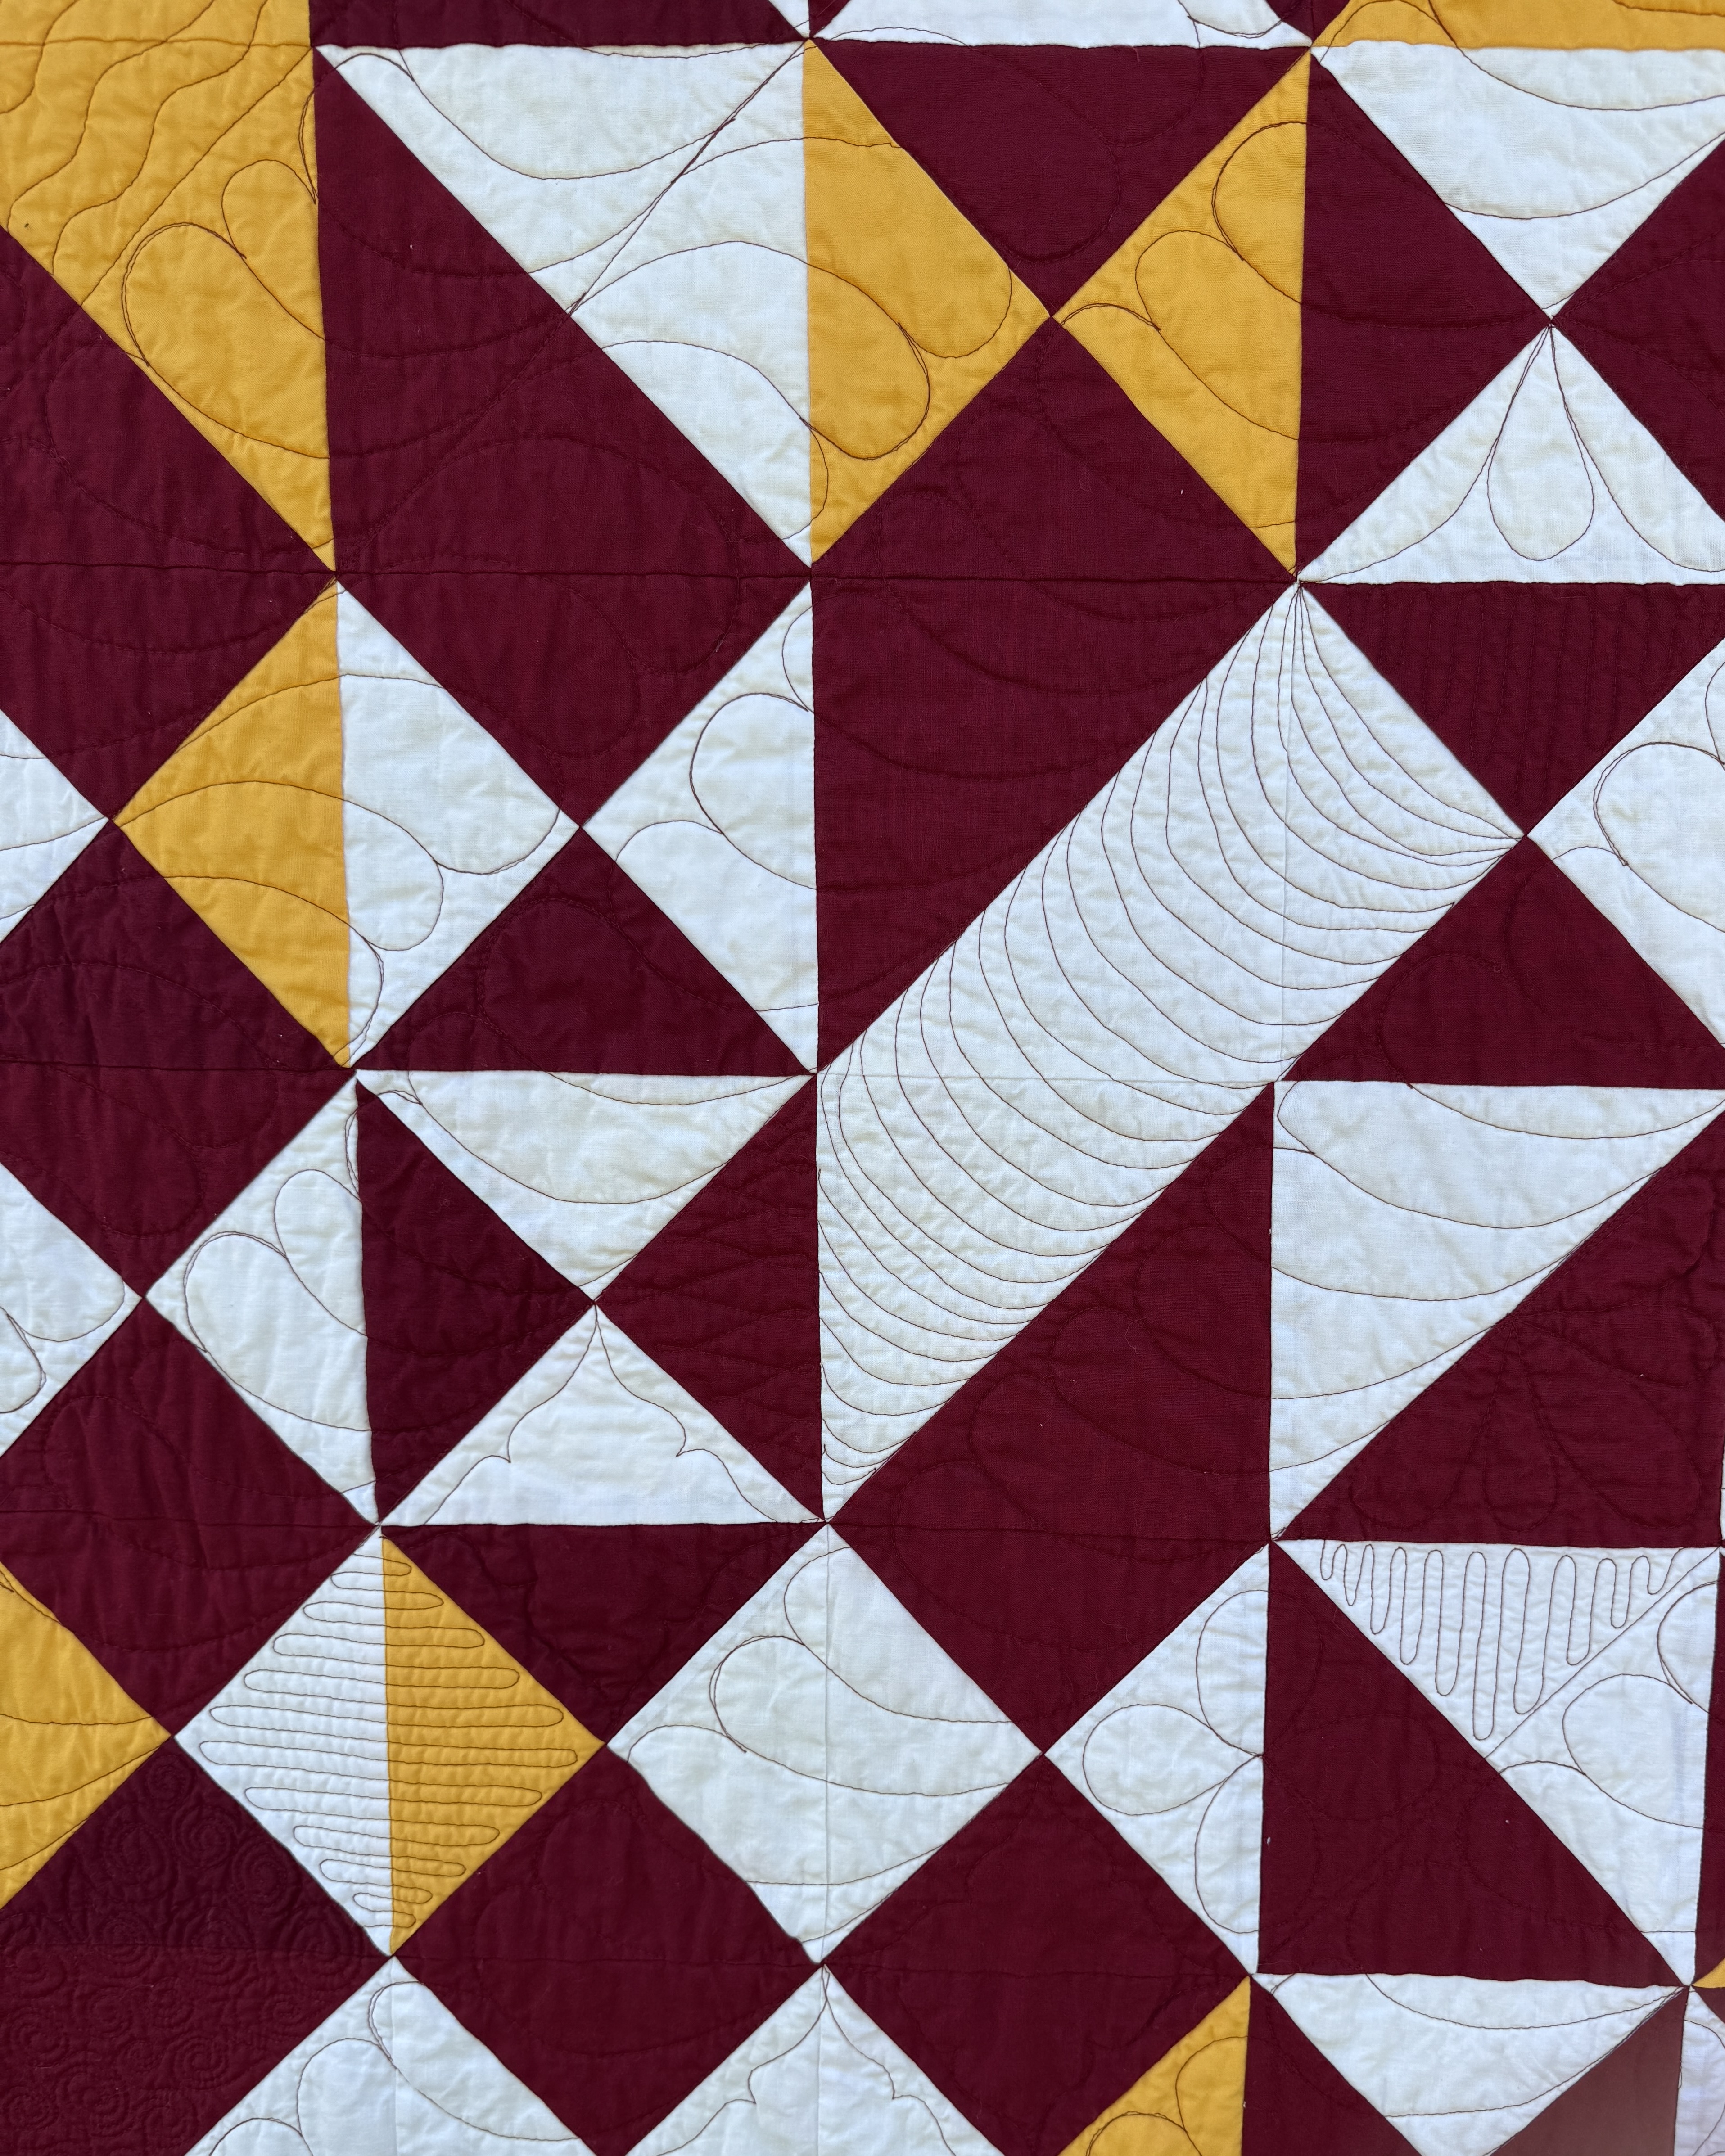
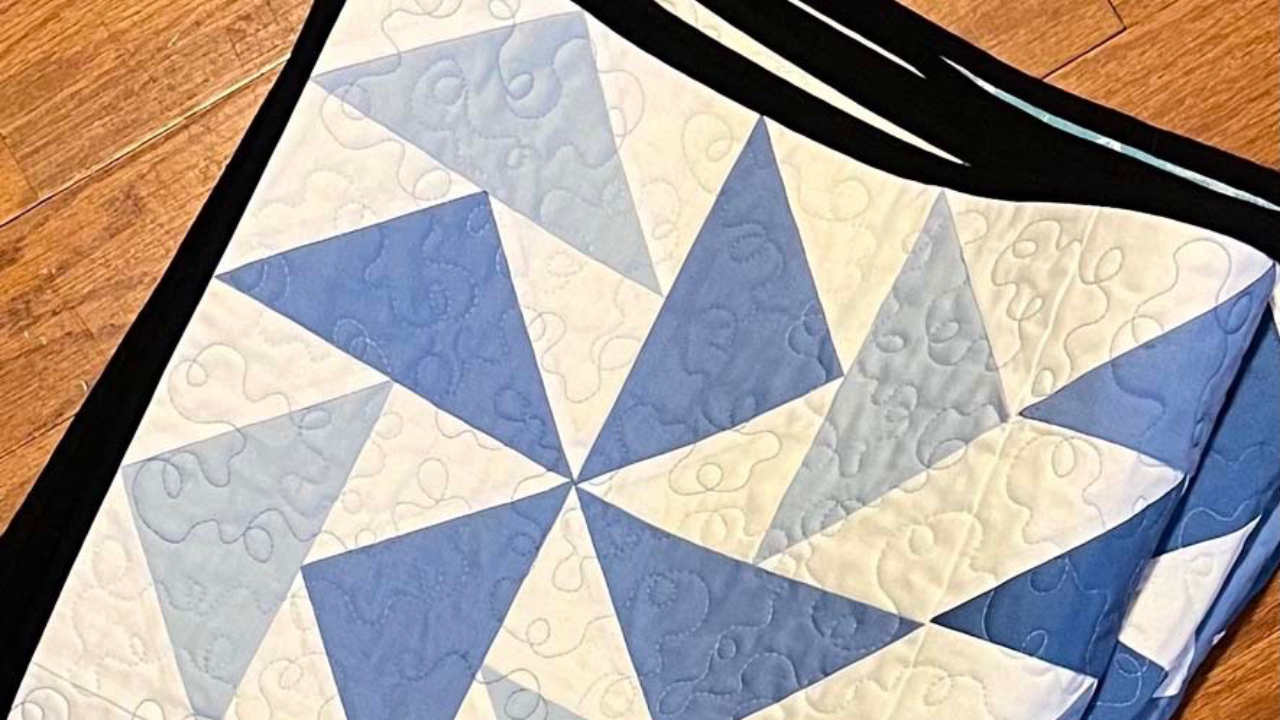
My original quilting plan only called for feathers in every other diagonal row. When I finished that part, it didn’t look quite finished, so I kept quilting! For the second pass, I decided to choose a free motion quilting design for each space once I got to it. In addition to the feathers, I used switchback, wishbone, pebbles, meander, rippling river, ribbon candy, embellished continuous curves, waves, flowers, and some text stitching.
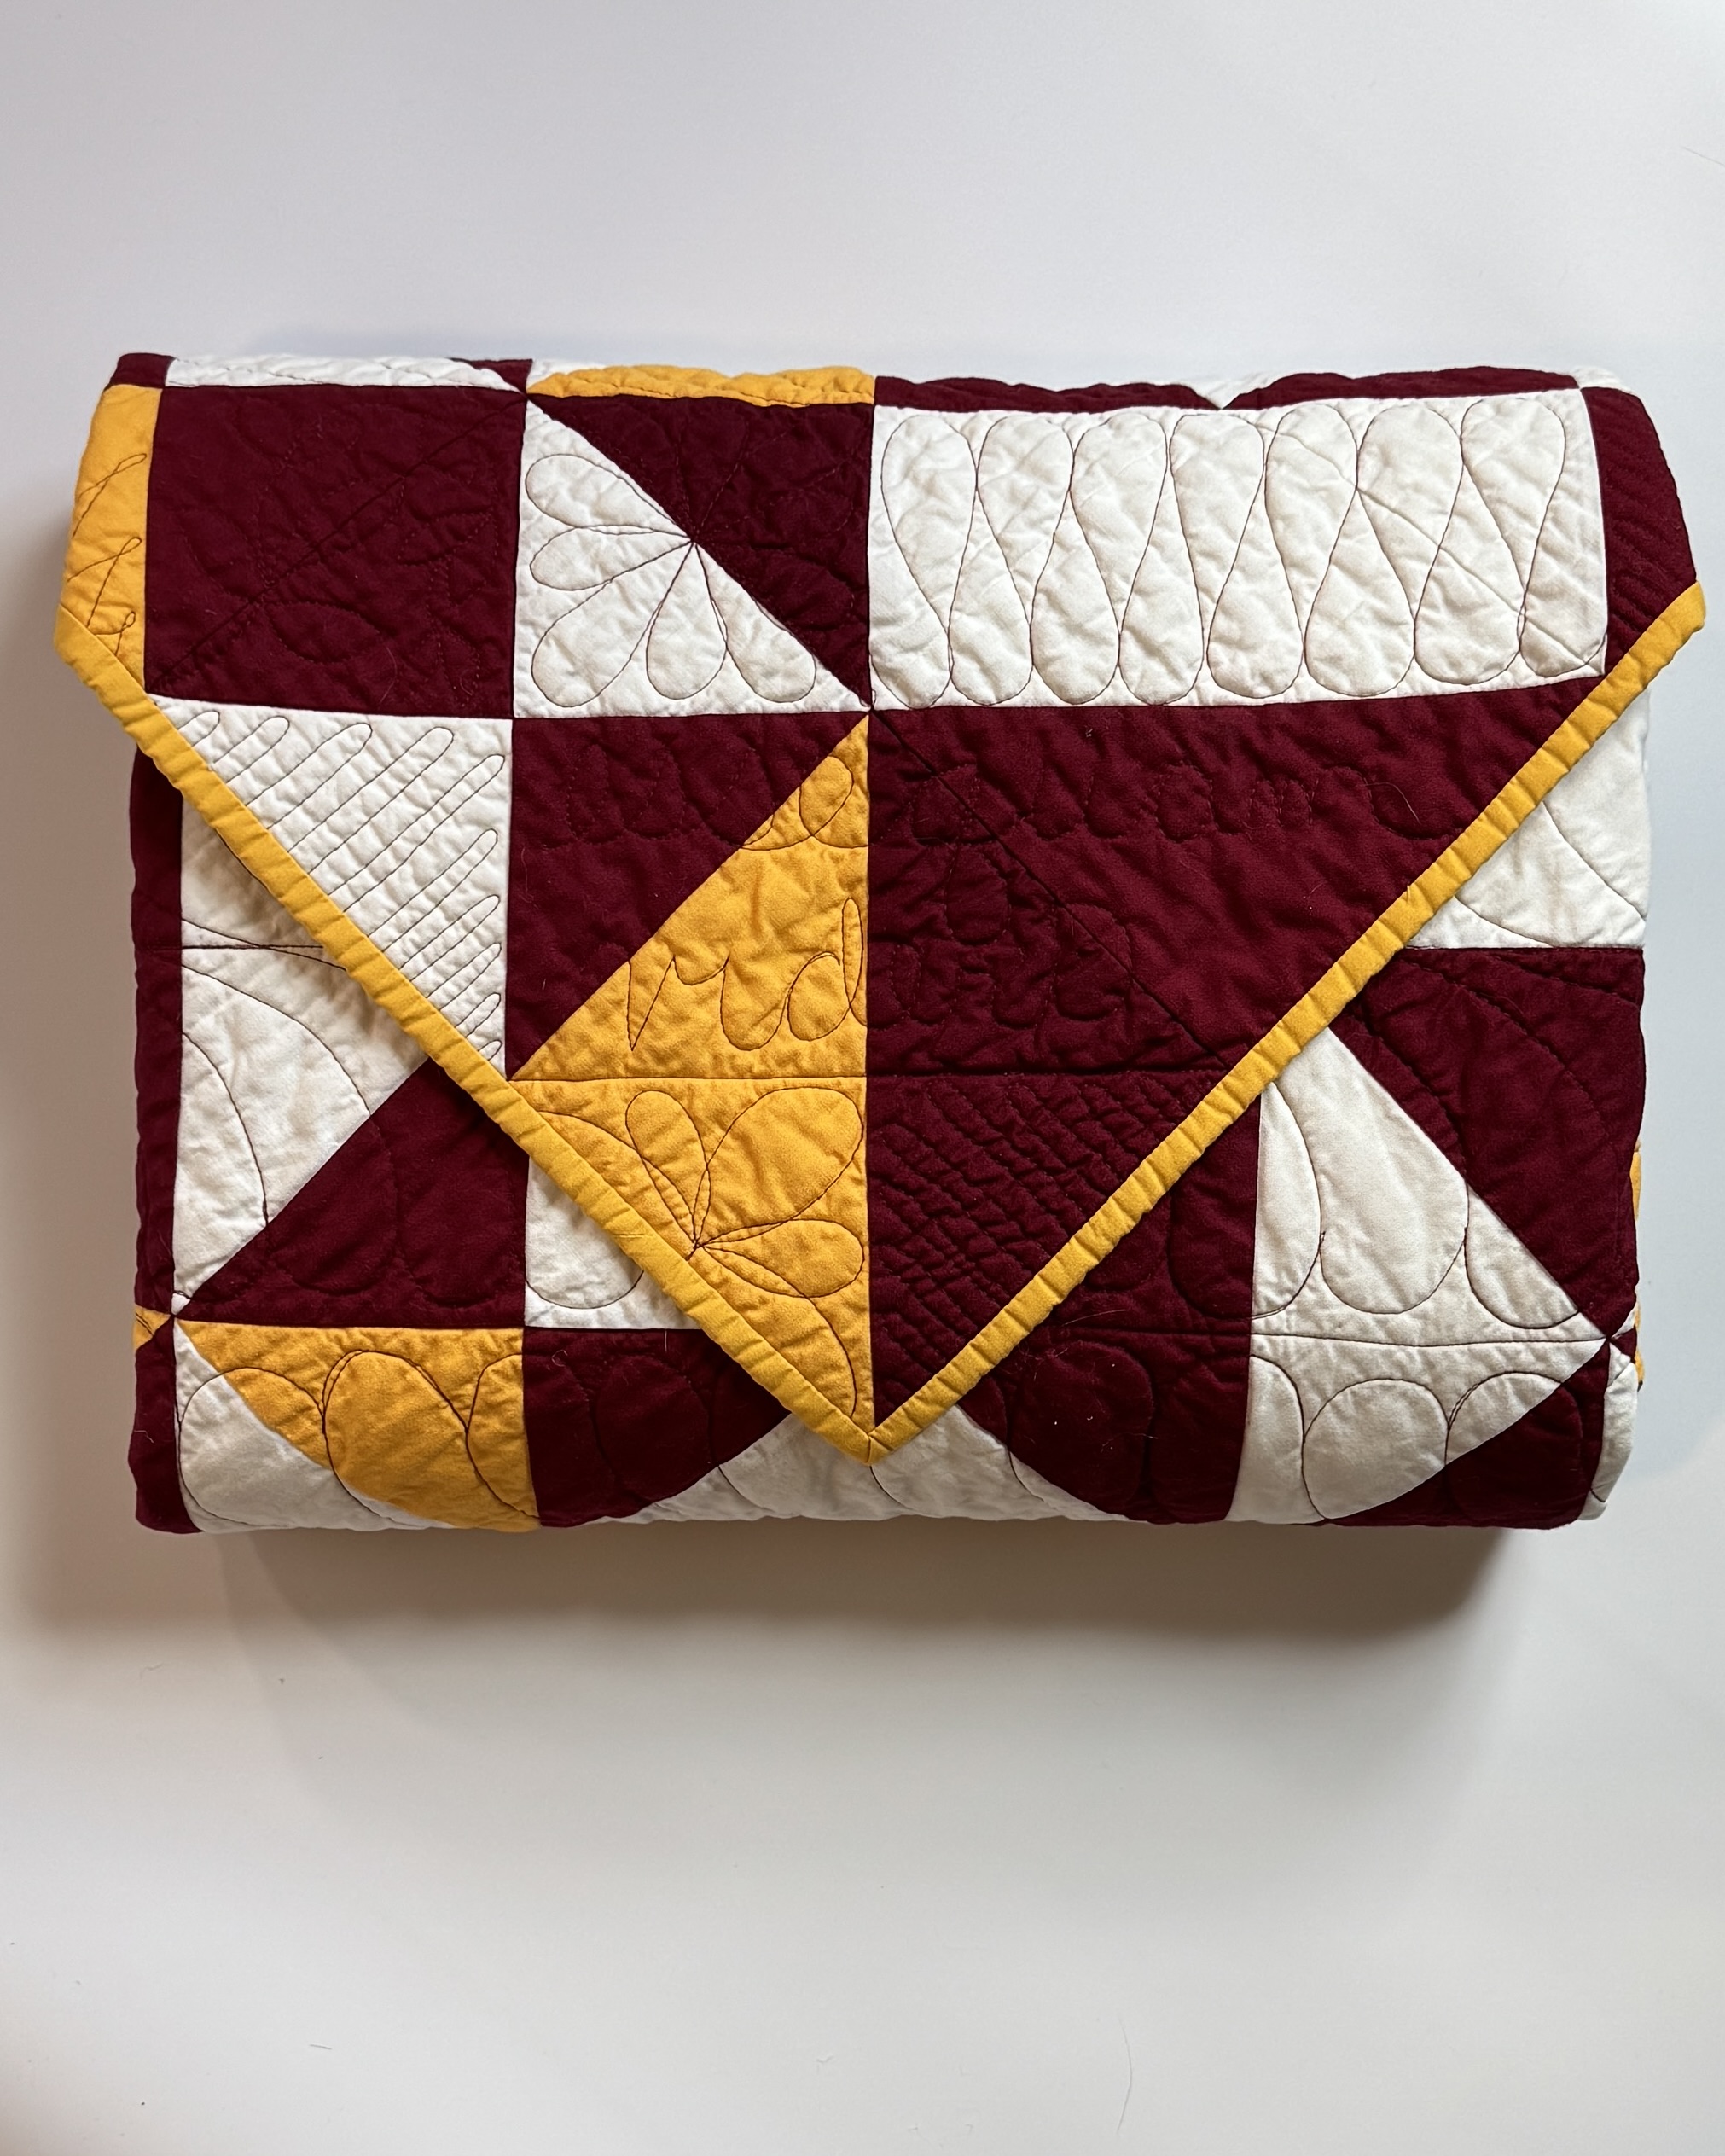
I wanted to infuse the quilt with as much meaning as possible, so I quilted her college’s motto into the bottom right corner. It reads esse quam videri, which means "to be rather than to seem."
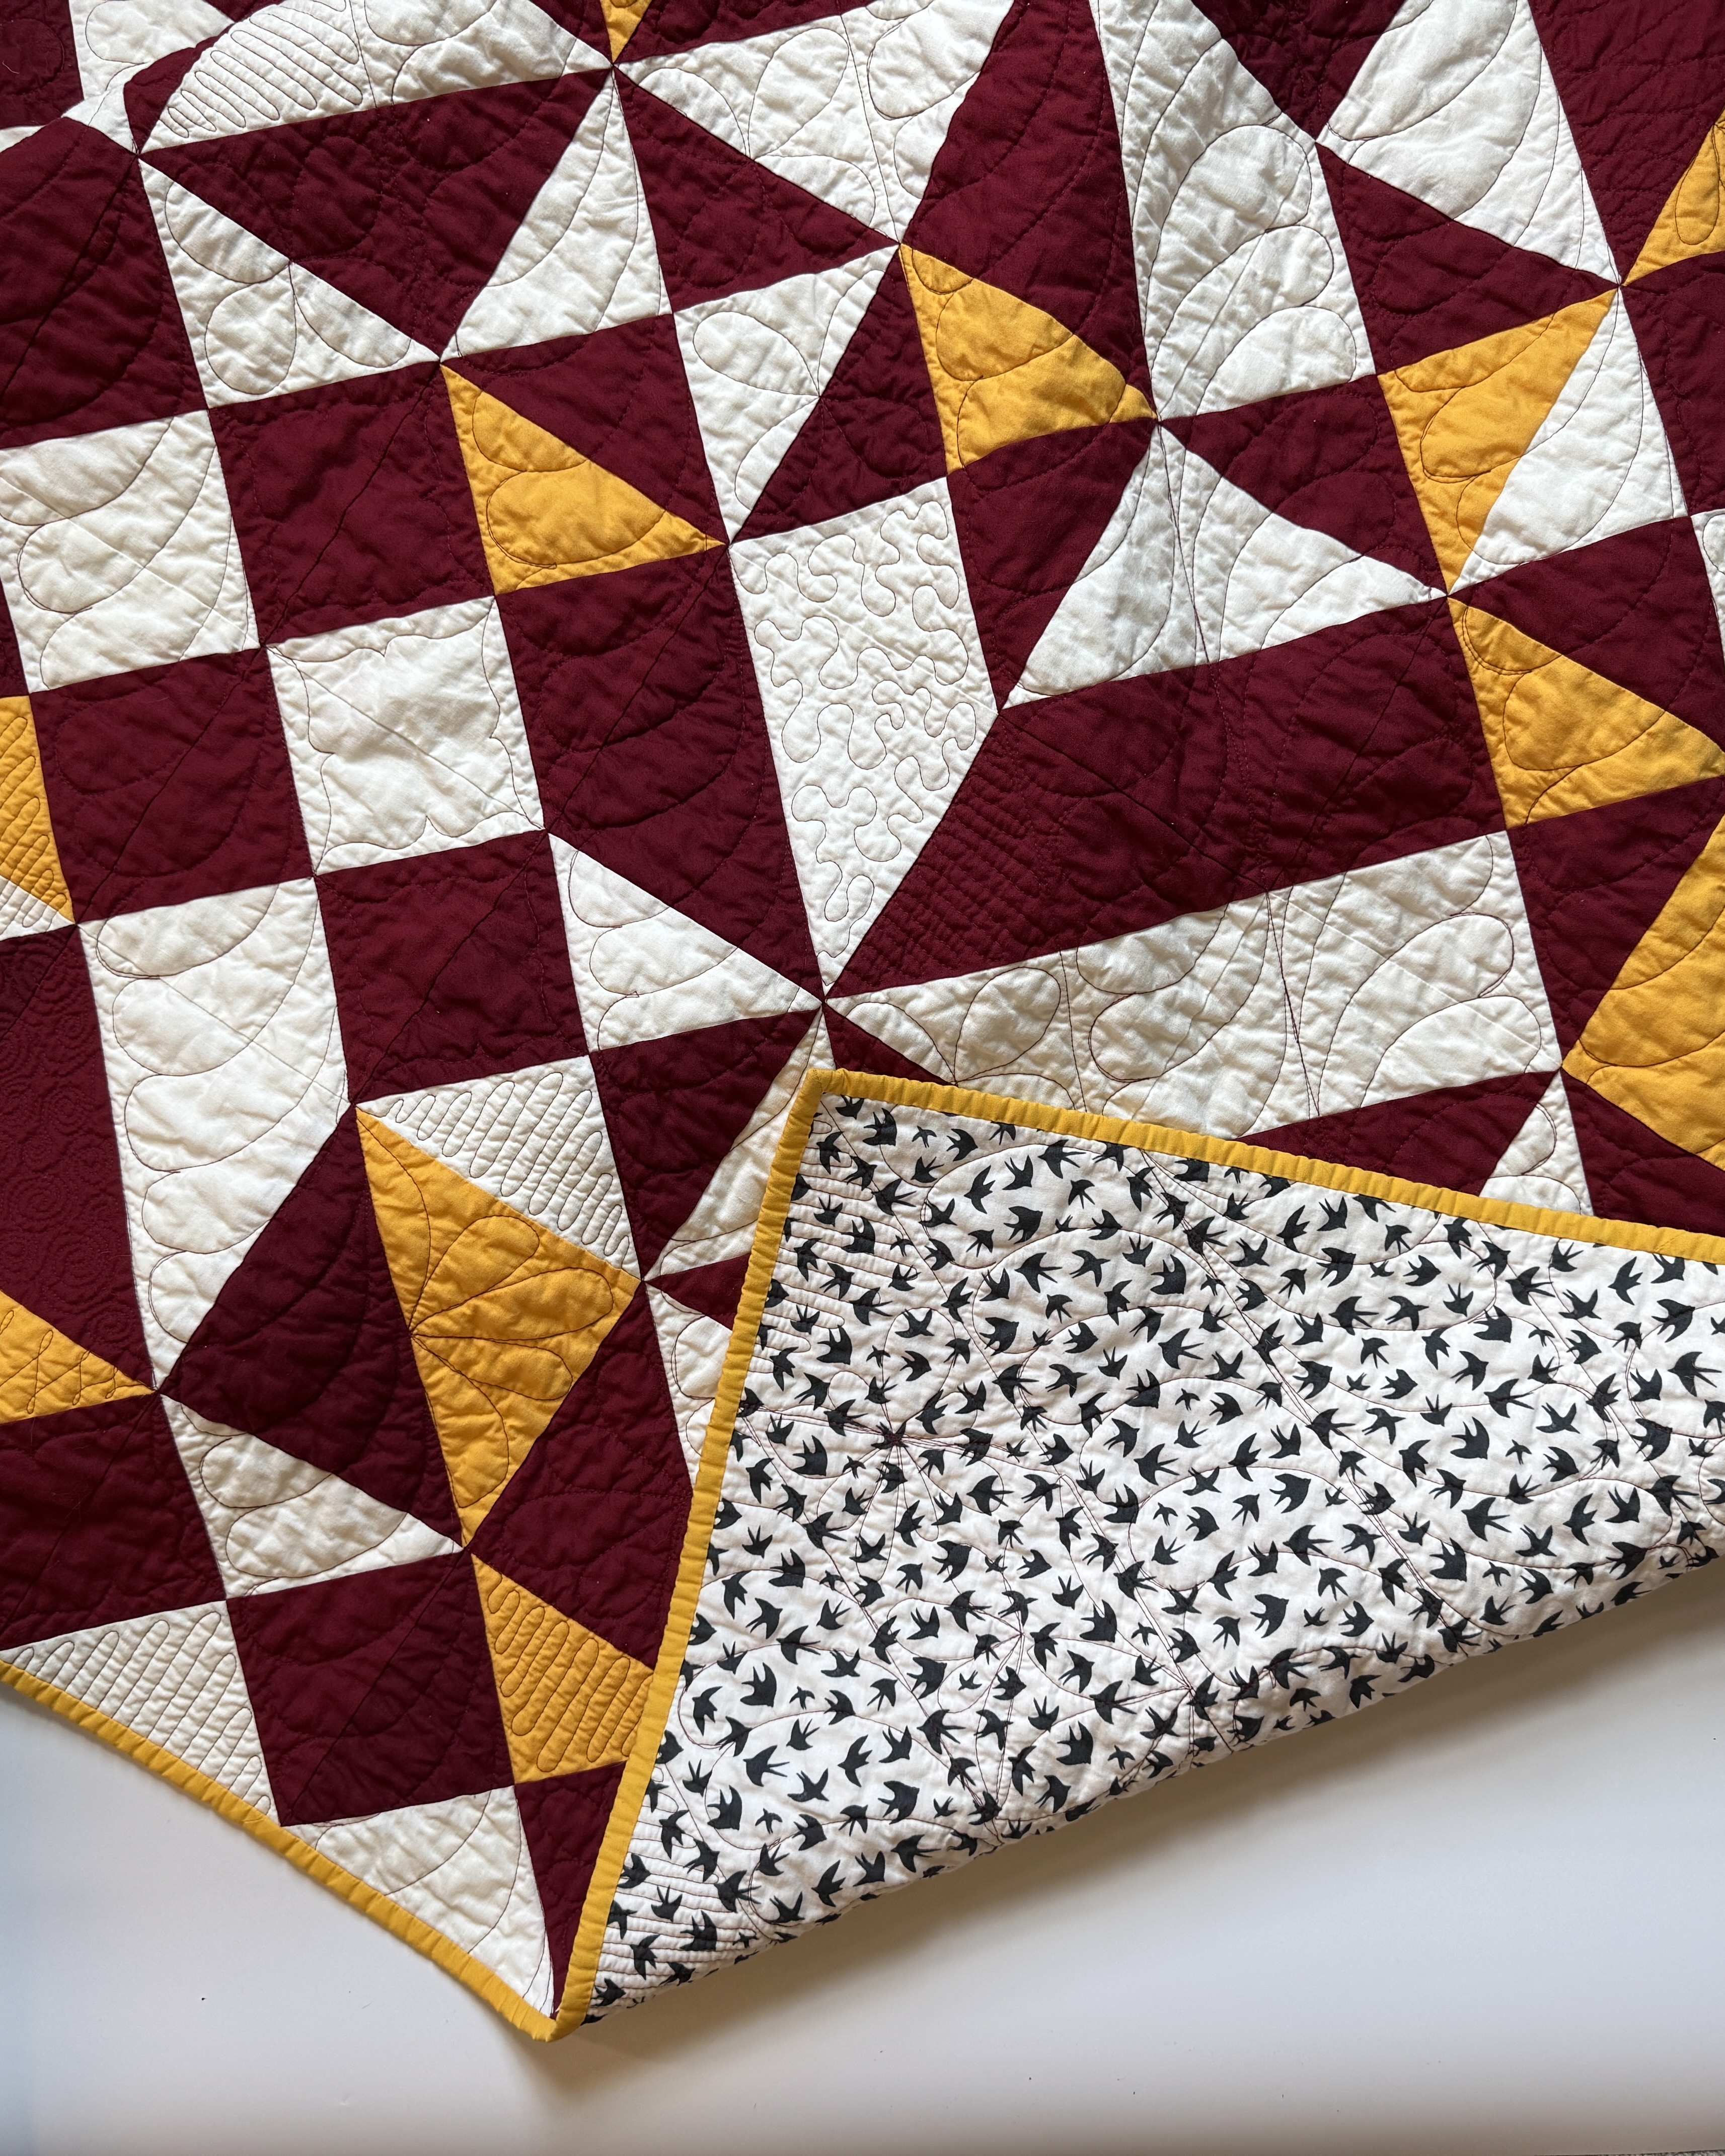
I used this bird fabric because her graduation signifies her leaving the nest. (My sister cried a lot while I explained everything to her.)
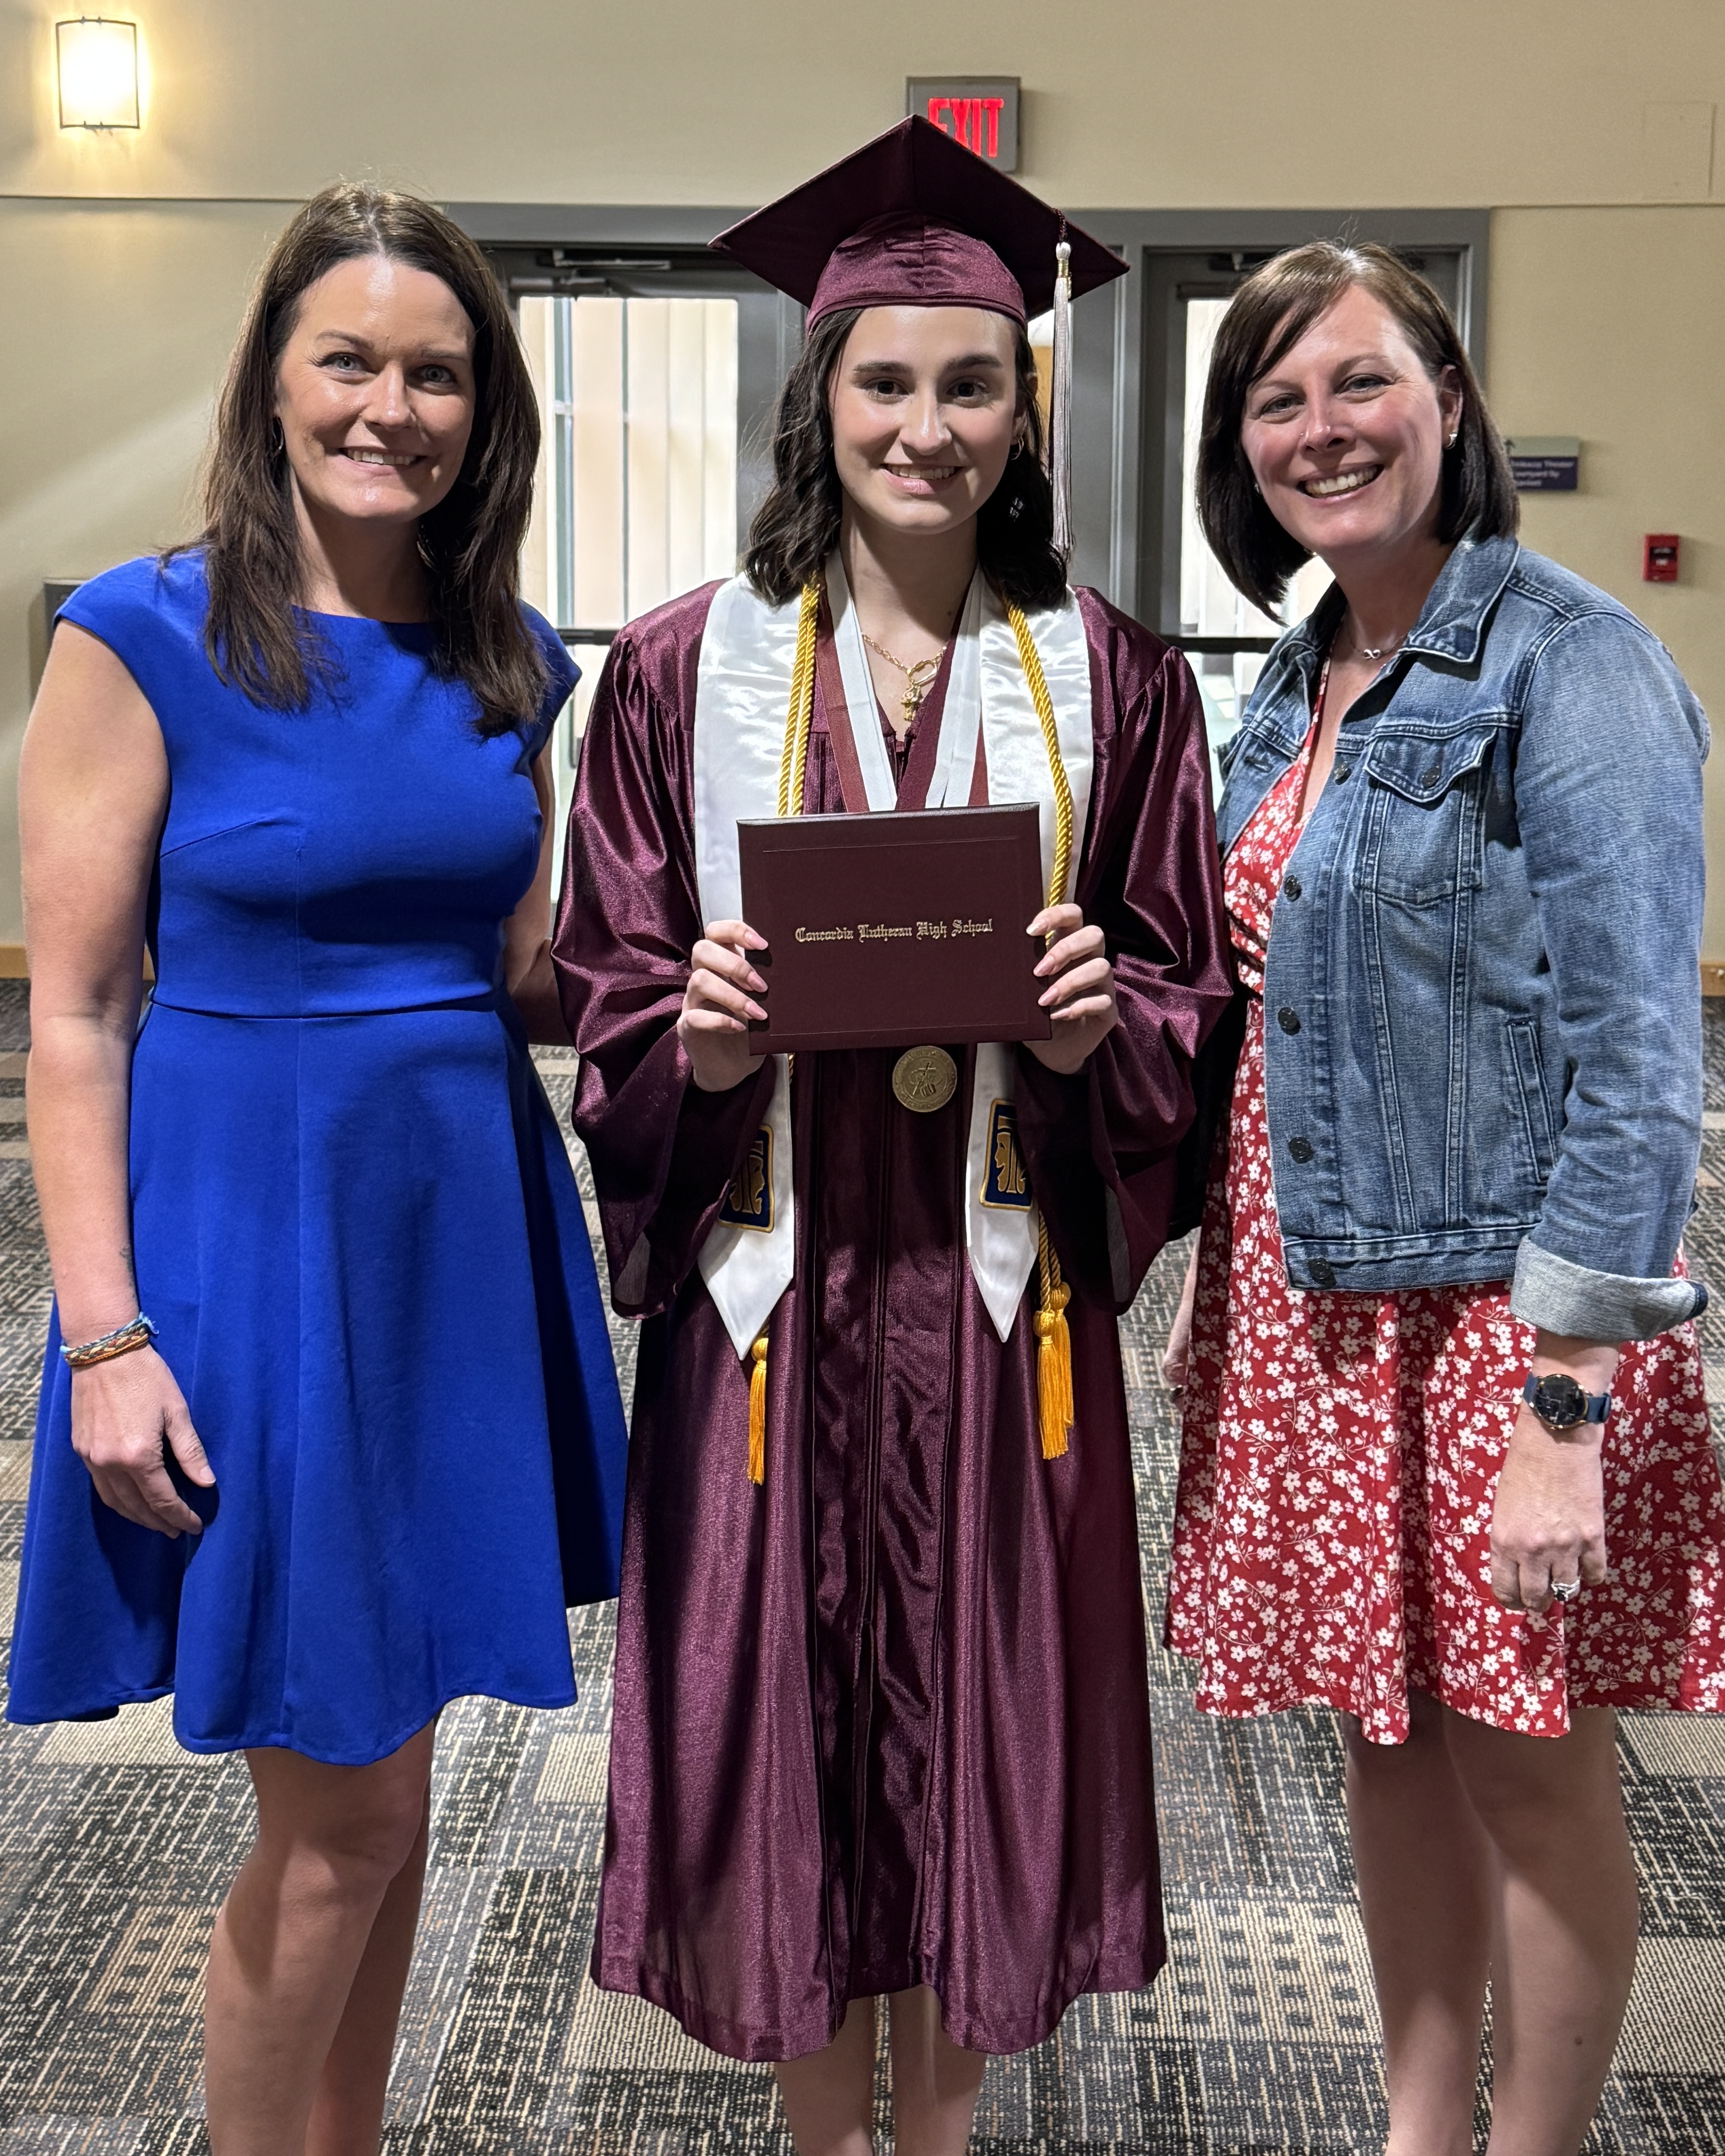
And here’s the graduate with her mom and her aunt. We are so proud of her.
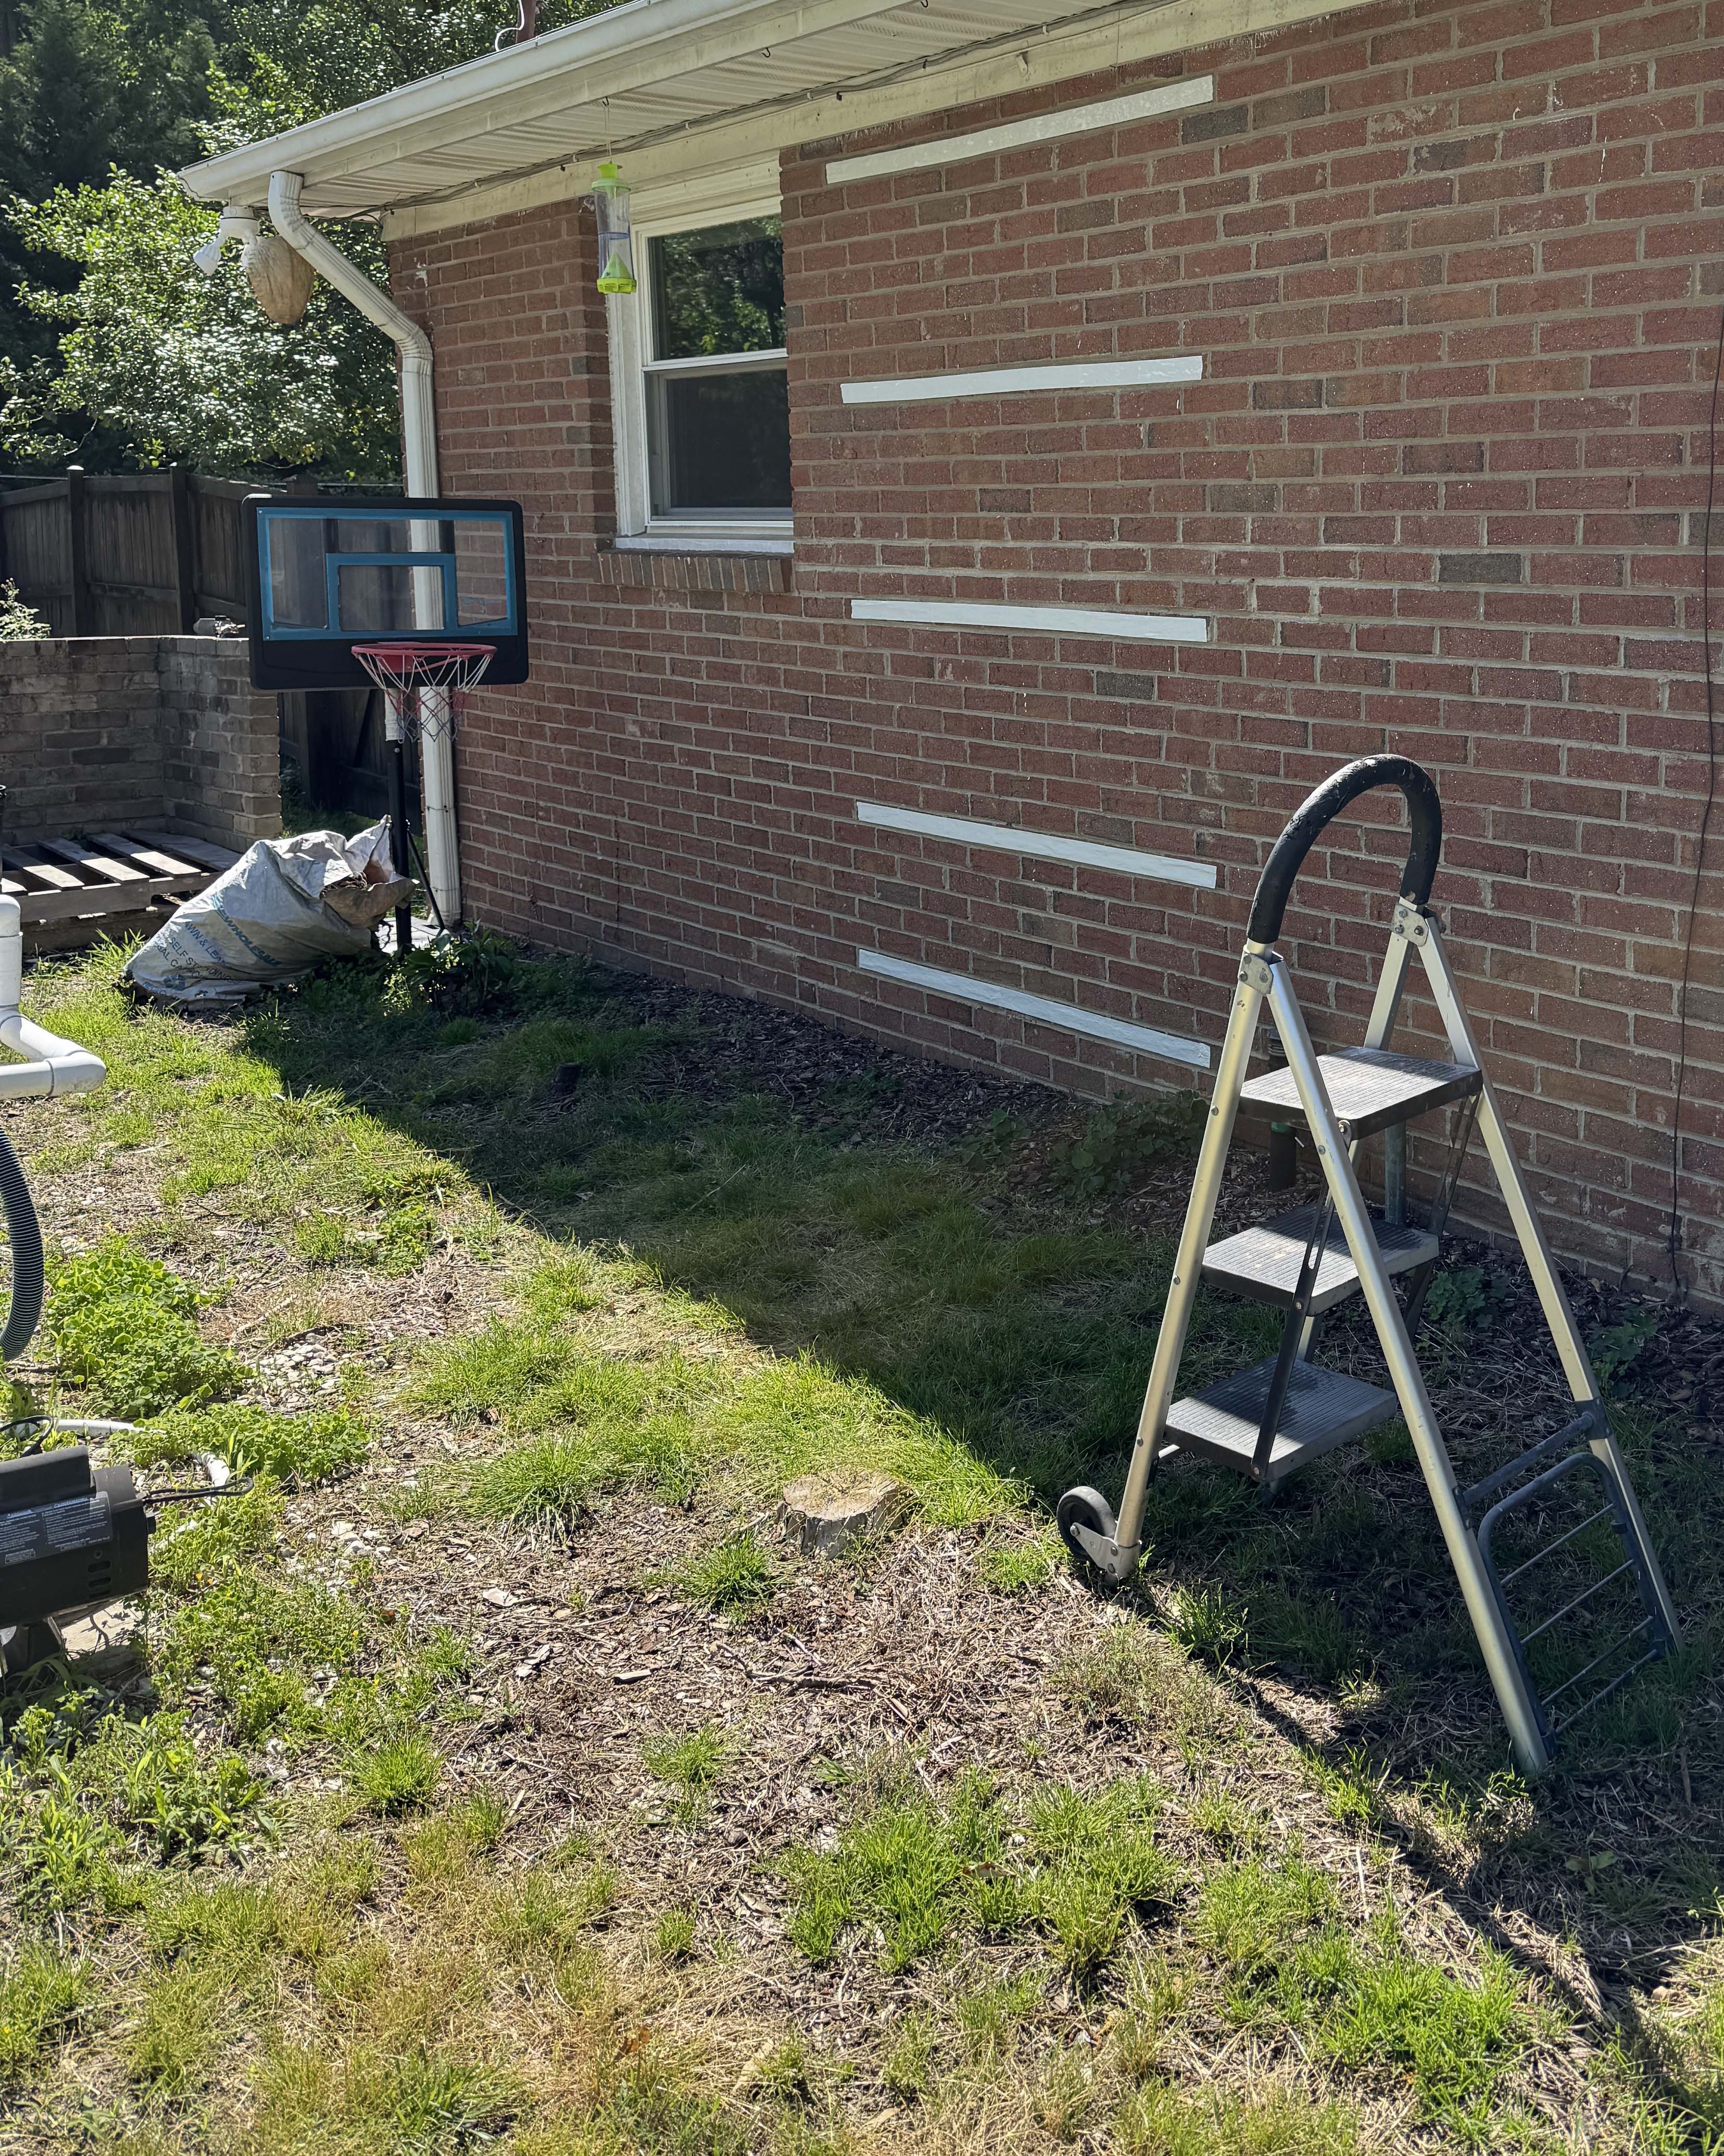
If you’re wondering how I got such a great image of the full quilt without needing someone to hold it up, double-sided carpet tape is my friend here. I apply several strips on the wall to match the width of the quilt. Then I peel off the paper backing and press my quilt to the tape until I know it’s secure and flat. It stays up the entire time I’m taking full pictures and close-ups. I’ve tried this with a couple of my finished quilts so far, and I love it.